Projects Page
I have posted many of the projects on "My Blog". Going forward, that is where I will be posting projects.
Mini Tree Construction
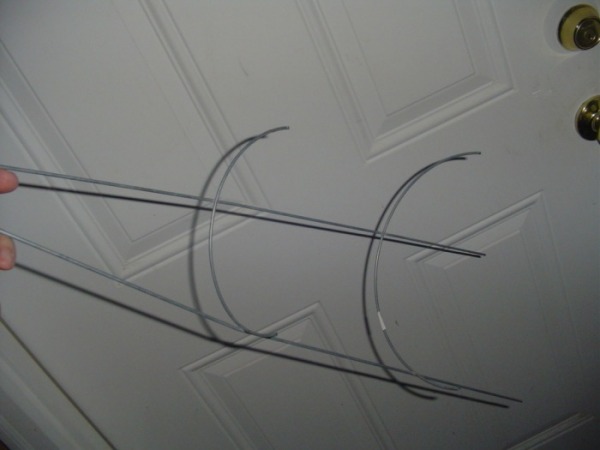
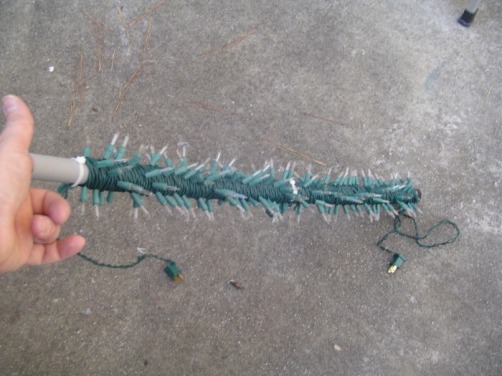
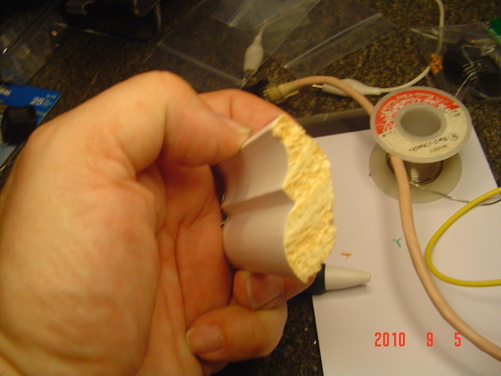
This is the beginning of the mini trees. It is a 36" tomato cage. The bottom is cut out.
This is the bottom of the cage. I went right up to the edge to cut it.
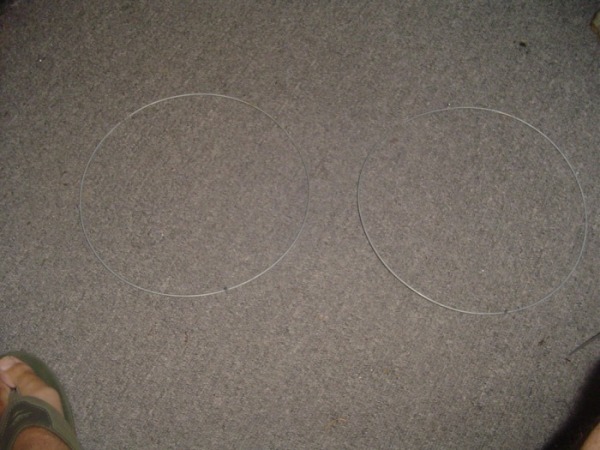
This is the two bottoms of the two cages. They will be combined into one "fatter" mini tree.
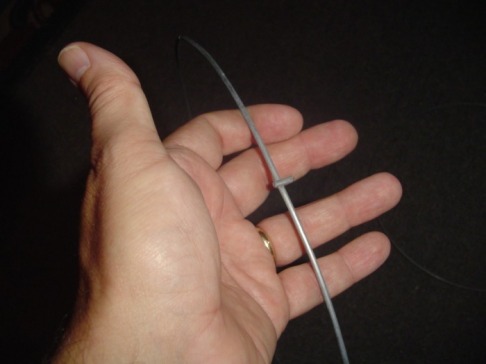
Then I cut it in half. I later decided this was stupid of me to do. I just cut each loop in the middle. Pulled it apart, then shoved the other one in. I would rotate it to have the vertical legs spaced evenly around the sides. No measuring, just eyeball it.
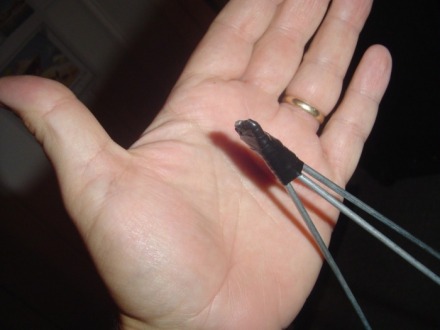
I was sure to tie wrap and tape the top. It is sharp ;-)
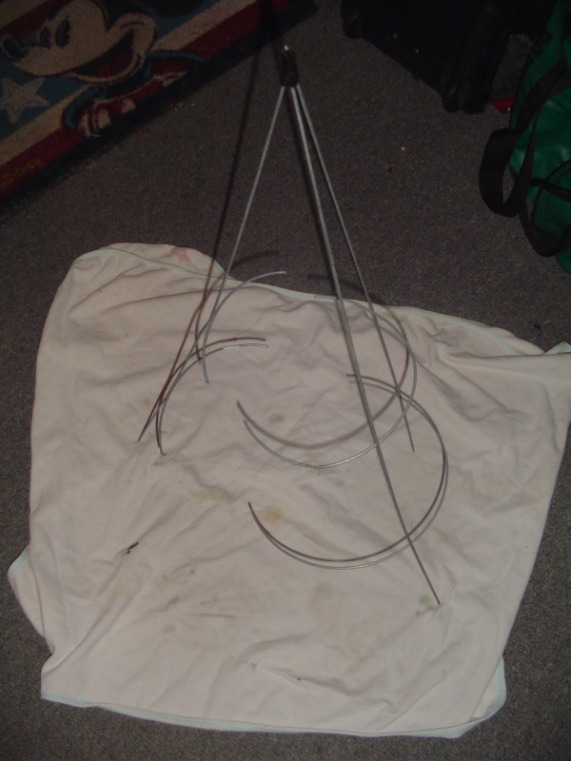
This shows ONE of the TWO cages being pulled apart. I will use two cages to make one.
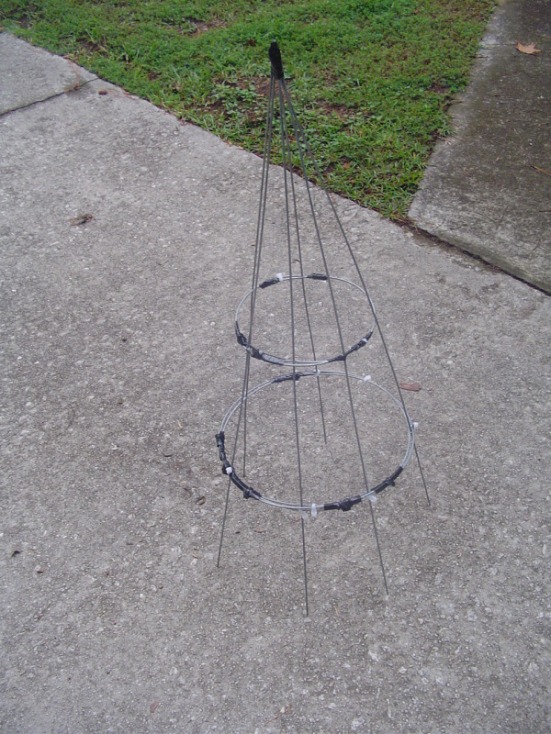
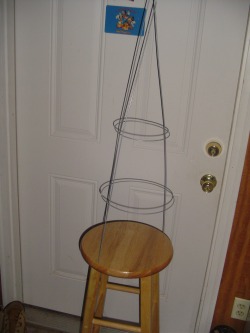
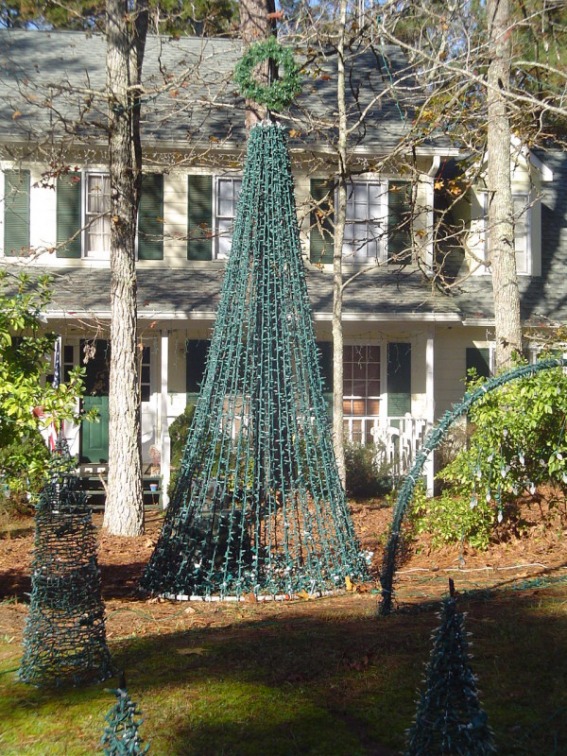
This shows the final mini tree without the lights. Notice I reused the cut out ring at the bottom. In later ones I did not use it. Notice the tape as well. Those ends are sharp! The legs now can be stuck in the ground and can also have the ability to "level" each tree. This is important in my yard because it is not flat.
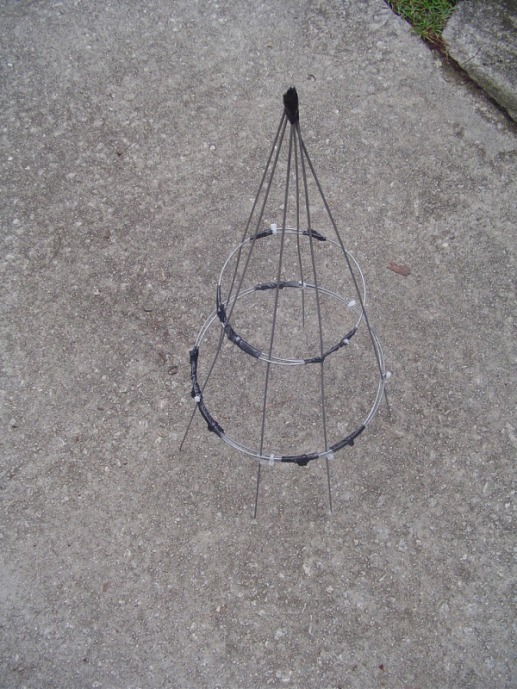
Little bit of a different angle.
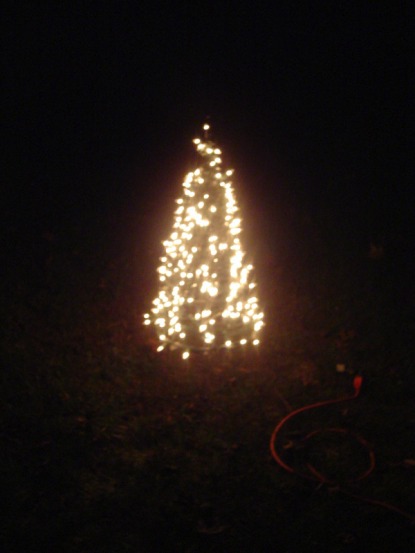
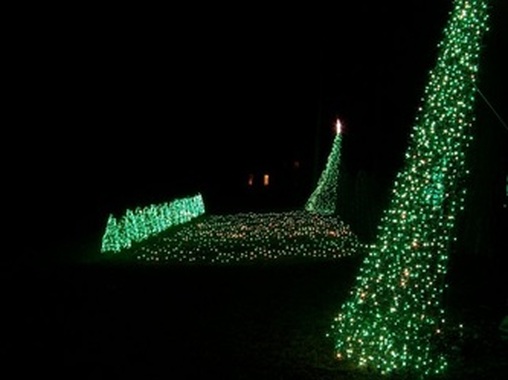
This is a poor quality picture. Very out of focus. Will give you an idea though what it looks like lit up. I will have MUCH better pictures when all 20 of these trees are done :-)
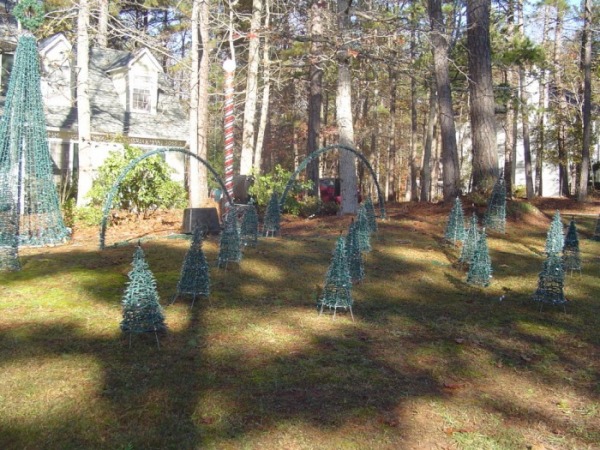
Here is a shot of SOME of the 16 mini trees in the daytime. Each is wrapped (and tie wrapped) with 300 lights each (.99 amps). In the background you can see the 42" tomato plant cages. They are wrapped with 500 minis.
Notice on the bottom of the small trees are stuck into the ground. Great way to secure them, especially since my front yard is not level.
Notice on the bottom of the small trees are stuck into the ground. Great way to secure them, especially since my front yard is not level.
Important Mini Tree Note;
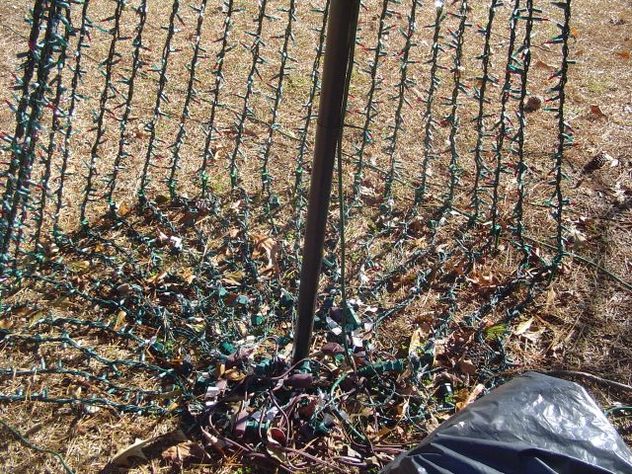
After taking the above pictures in 2009, some important issues came up. One night when it rain, my CGFI's would not quit tripping. Turns out that the wet METAL cage was seeing the WET ground. The thin insulation on the wires...could then see wet ground. There in turn, the breakers would trip. The black you see in the picture is "Plastic Dip". In 2009 I used this to dip the legs in trying to add some insulation. It did work for the time being. However, because of the lights already being in place, I had several that had the black plastic come off in the grass. It had dried on the grass. Fast forward to 2010. I decided to strip off some of the plastic dip and use "Shrink Tubing" on the legs. Look closely and you will see I actually used two tubes of this to double up the insulation. That way the leg would not rip through the tube. I also do not shove these hard into the ground. I do push some to level it up, but that is all. The excess on the leg is so that it will curl up when you push it into the ground. That way the water does not work it's way up the leg. It does not let water in from the top side of the grass either. Has worked flawlessly during the 2010 season with several hard rains.
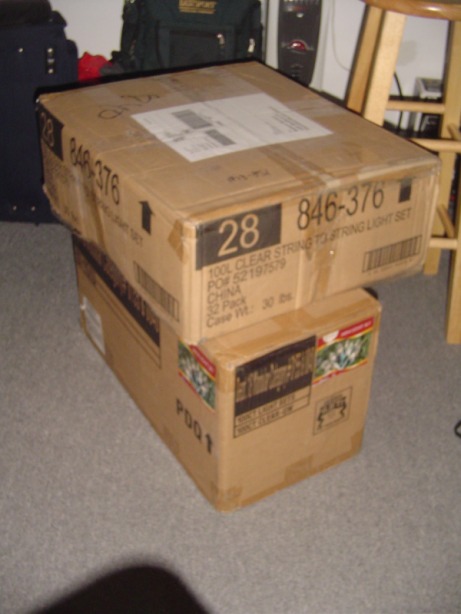
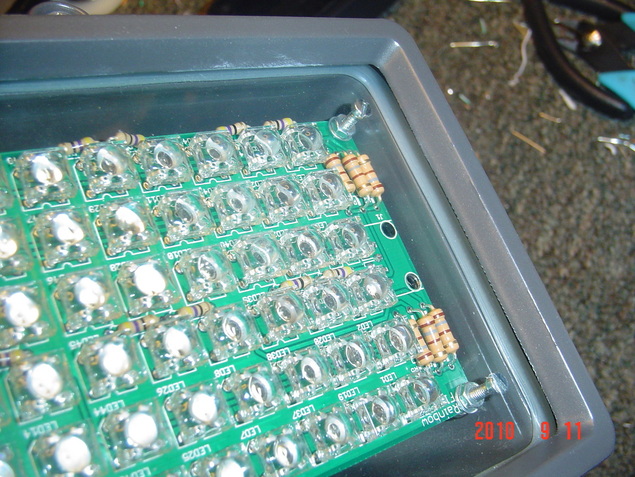
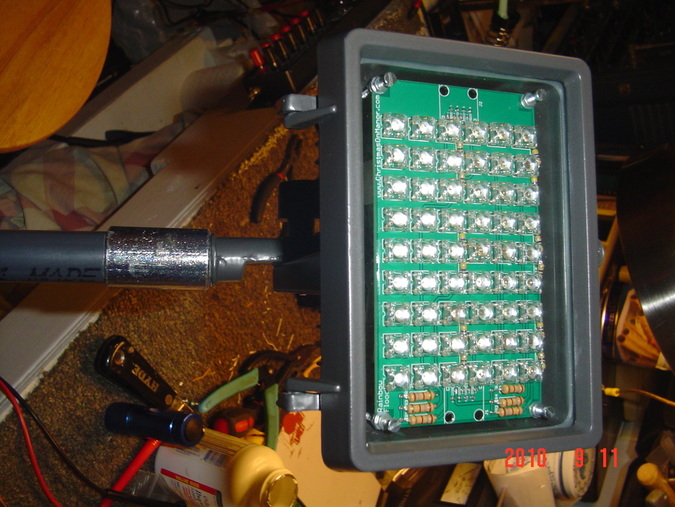
86 lbs of lights! New in the box 100 count clear minis. 82 boxes. This will be used on the mega tree, mini trees and the mid sized trees.
Mega Tree
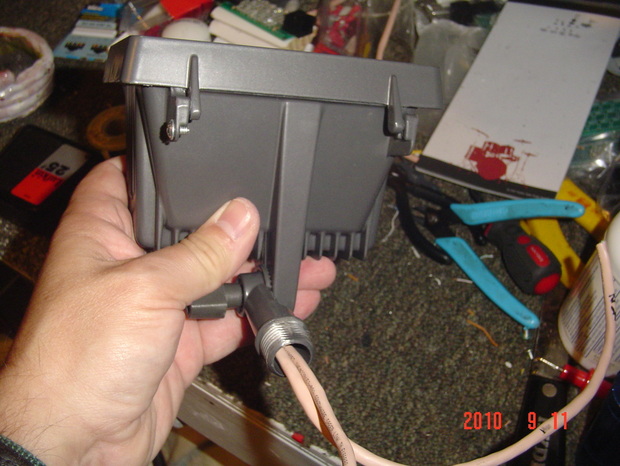
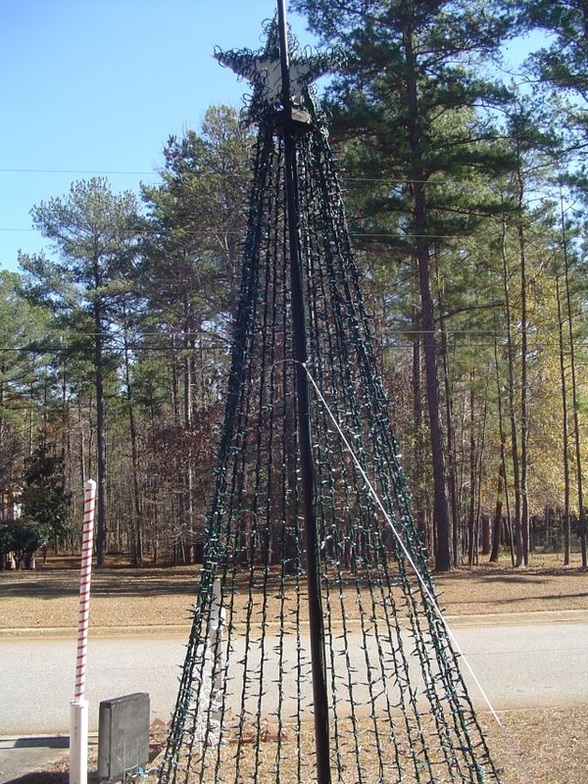
Here is a daytime shot of the mega tree. 12 channels, 8 slices, 3 colors, 7200 lights. Wreath on top has 60 LEDS on it. Great topper and the LEDS are very bright. Not sorry now that I didn't get the strobes. Changing sequences to have this twinkle in my strobe sections. Strobes? Next year :-)
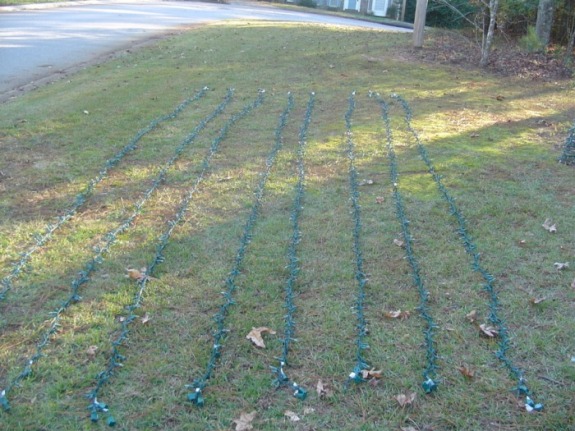
This is a picture of some strings for the mega tree install. 3 strings are twisted together. Had to make 24 of these strings. Clear, Red and Green.
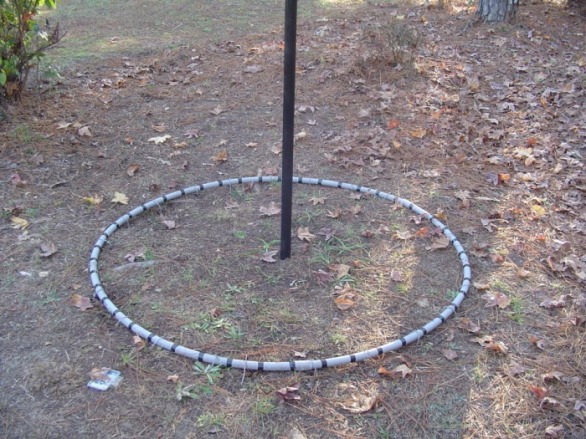
This the hoop that the lights attached to. 5ft diameter. Marks are 3.8" apart. It is anchored down by wire from the mini tree hoops that were cut off the bottom. Just bent them, shoved them in the ground...and are holding up great. Had 2" of rains the other night...no problems. The pipe is a 10ft galvanized one. Have another smaller pipe hammered in the ground that it slide over.
Arches
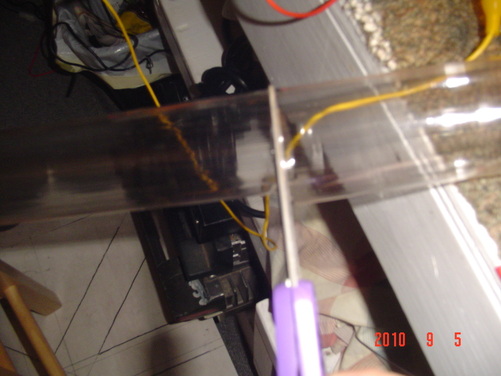
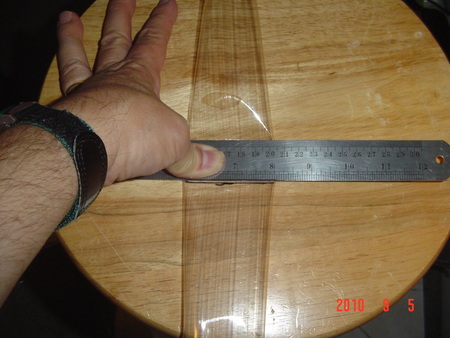
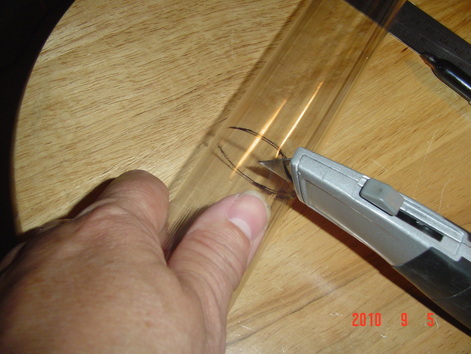
This is a pic of a pvc pipe (38") wrapped in 100 mini lights. Twisted round and round, tie wrapped on each end.
Check out this website for details; http://www.christmasinshirley.com/wiki/index.php?title=Light_Arch
Little closer shot.
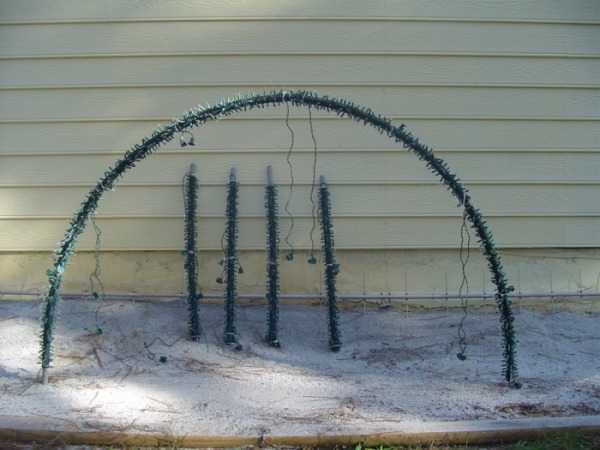
Shot of one arch with the parts to the other one. 8 sections on each. Combines 2 arches for 8 channels. Could have done 16, but didn't have the channels left :-(
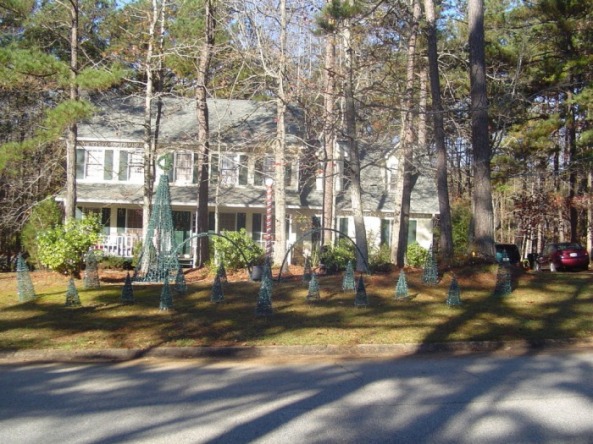
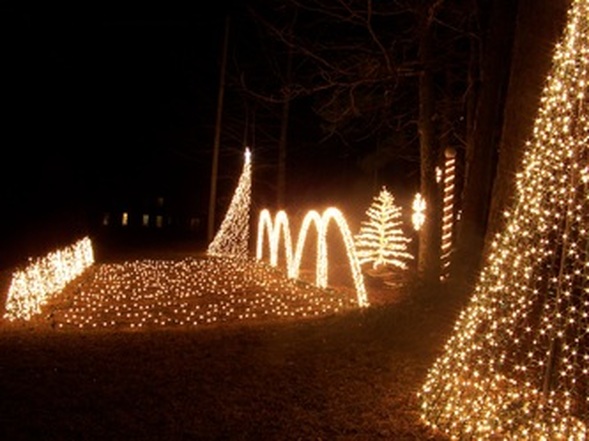
Daytime shot of the modest setup. Night time pics coming soon.
Lights in the trees, lights on the house (c9's and icicle) and in the bushes.
Lights in the trees, lights on the house (c9's and icicle) and in the bushes.
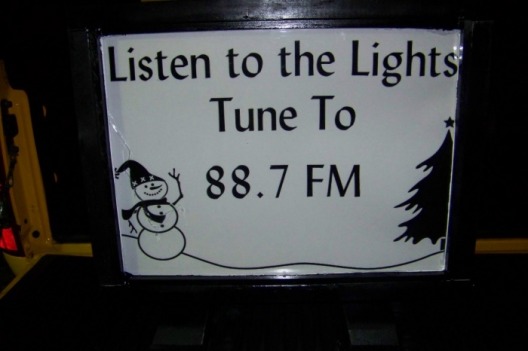
Radio Sign
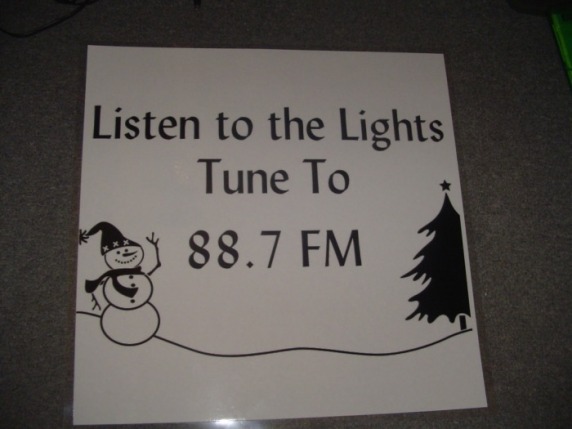
Here is my "Radio Sign". It will tell folks what FM station (frequency) to put their car radio on. I finally decided to just go with a simple 18"x 24" large format print. Got on "Bulid-A-Sign" and designed one after reading about this on PlanetChristmas.com . Had it lamented as well. Cost about $15.00 for both. Better than the $45.00 in color and much cleaner look than what I could have painted.
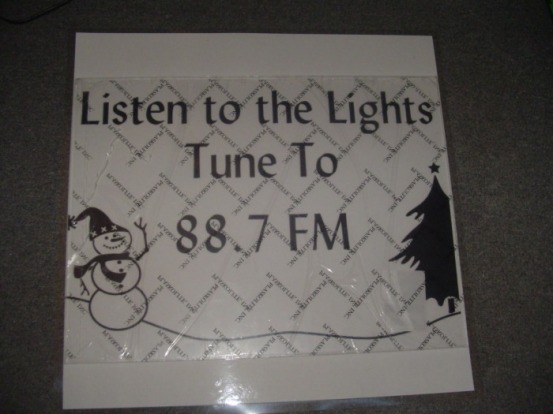
This shows the plexiglass on top of it. Will have to trim off some. Will show the box construction later. The sign will be backlit.
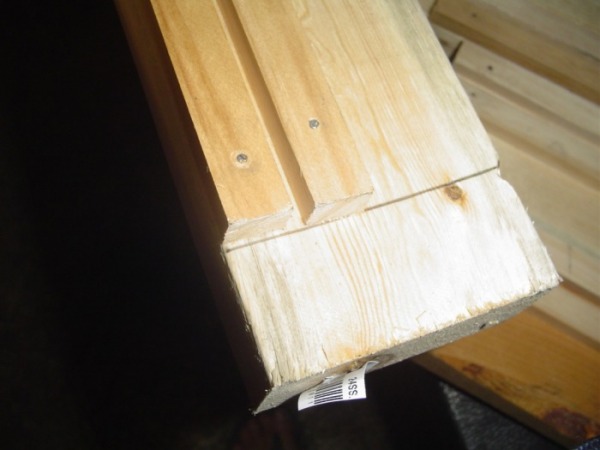
Radio Sign - Materials
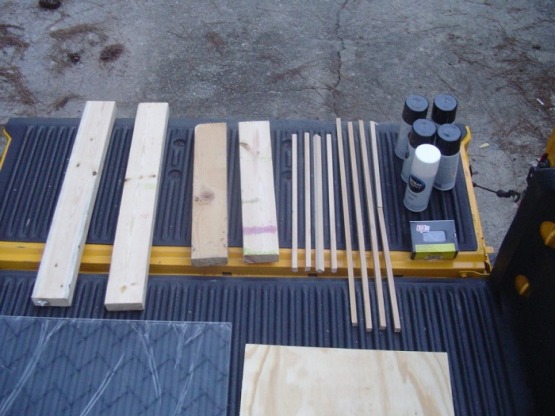
This picture shows the different parts for my sign. 2x4 boards, 1/4 wide wooden strips, 2" finishing nails, black and white spray paint.
Radio Sign - Materials
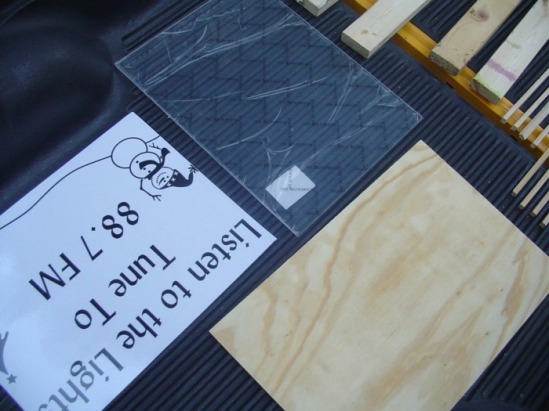
This pic shows the 18x24" sign, 18x24" Plexiglas and 1/2 plywood.
Radio Sign - Materials
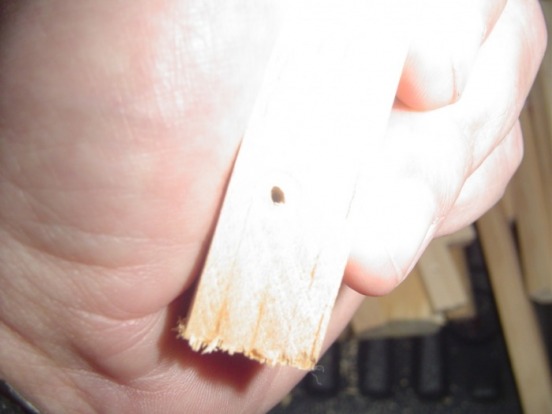
Very bad pic. I drilled small holes on each strip of wood so it would not split when I drilled it.
Radio Sign - Materials
Shows the two strips of wood where the Plexiglas slides through the slot. This is on all four sides. Be sure and make the "groove" you create large enough for the glass AND sign to slide easily down the slot. This shows a top piece. The side pieces have the "strips" with the new "slot for the glass" all the way down. Remember that the top piece has to be able to "sit" down on the side pieces. So you have to measure and cut that back some. You will have some play in the glass being loose in the slots. Take some silicone and fill in the gap with the glass AND the gaps in the wood before painting. You want to seal it as best as possible so as not to let moisture in.

This is the box. I painted it white so it might reflect better from the rope lights inside.
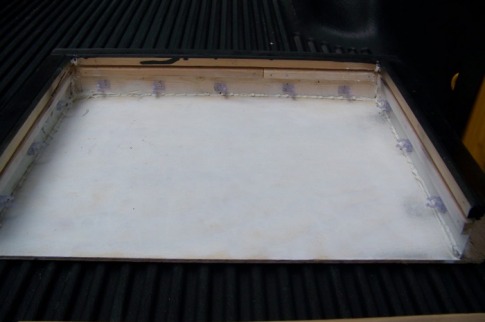
This picture shows the clips that will hold the rope lights. Kind of a rush job on this, but it will do the job.
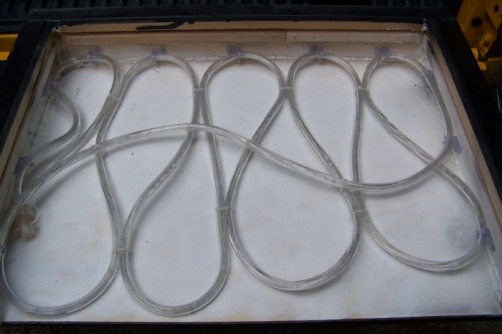
This picture shows the rope lights used to back light the sign.
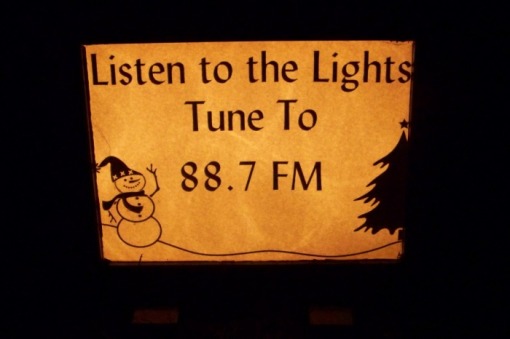
This is the final product. It has a 'Warm White' light rather than a bright white. Would have been nice for the 'Brighter' white, but this is what the rope light gave me. Still, it works and can be read from some 50 to 75 feet away.
This is a shot of the sign without the light on.
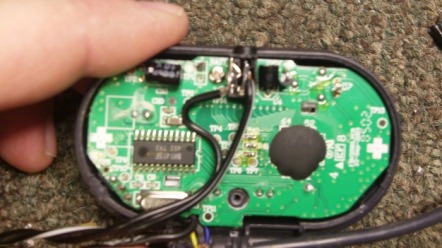
LOR Controllers
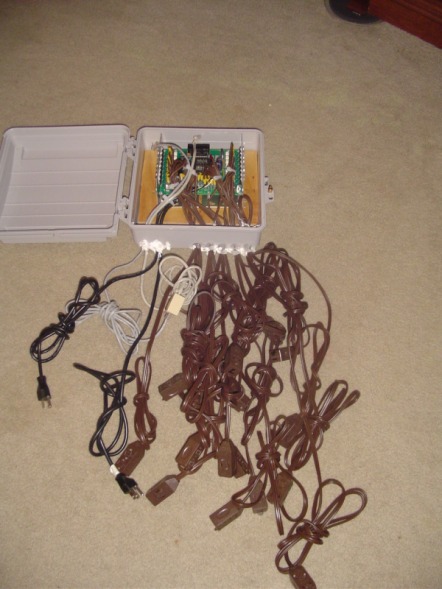
This one shows the longer dongles (cut off extension cords). I will use this one on my mega tree. These 2 boards I built from the kit. These are Light-O-Rama CTB16PC versions. 16 channel boards that can take up to 30amps each. Won't go near that amount though.
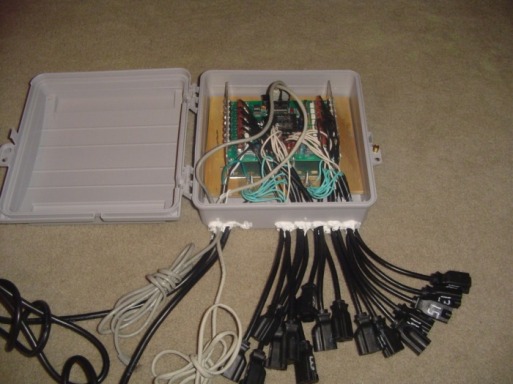
Here is one of the 3 controllers I have. This one has a little heavier dongles than the next picture.
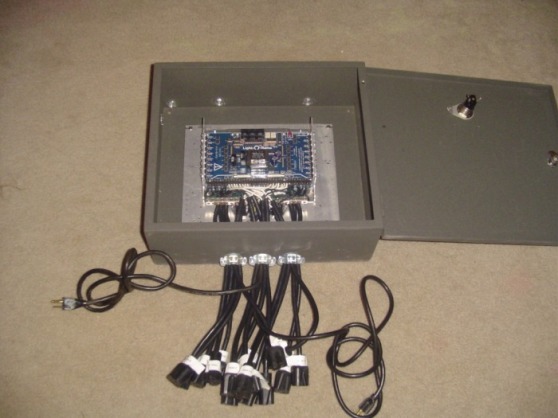
This is the Light-O-Rama CTB-16D. It is the heavier one of the bunch and could hold 40amps with the heavier heat sink. It is also heatsinked on a metal plate. This one will be the one I will use with my roof C-9's.
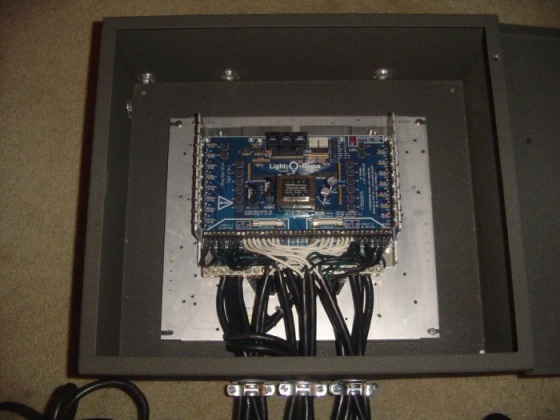
This one shows another pic of it.
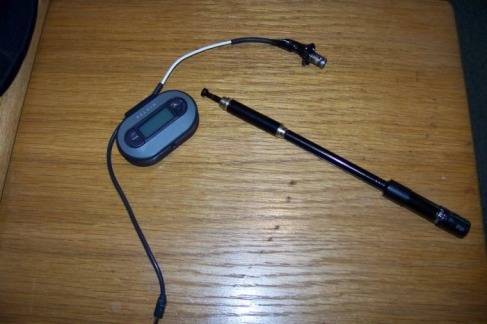
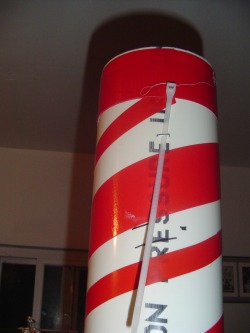
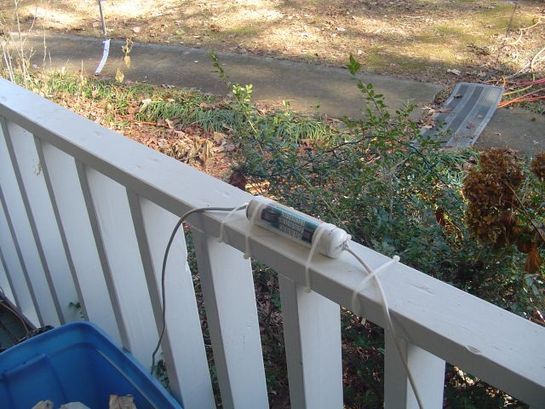
This is my FM transmitter. It is a Belkin Tunecast II. I have the pigtail on it for the extendable antenna. The signal goes the full length of the block. I may use the antenna at the top of my 50ft tower. Then it would cover the whole subdivision. ;-) (Update 10/09 - The little transmitter is soooo low power...you get tremendous loss in putting any sort of cable to the pigtail. I will have to put on a amp to make up for any sort of cable length...to get to another antenna. Probably will just got with this antenna shown. (!!!!!!!!!!!!!UPDATE!!!!!!!!!!!!!!!!!!! 11/25/09 The unit has such LOW output, had to scrap the pigtail idea and go with a wire for the antenna right off the board. Started with a quarter wave length (31.6') and then decided to go with a 5/8 wave (6.4ft). The transmitter and antenna is taped right onto the porch window facing out to the street. I may leave it there, or I may tuck it inside the North Pole that is about 30ft away from the street. Hope I don't have to do that. More invovled by getting ANOTHER extension cord out to that location.
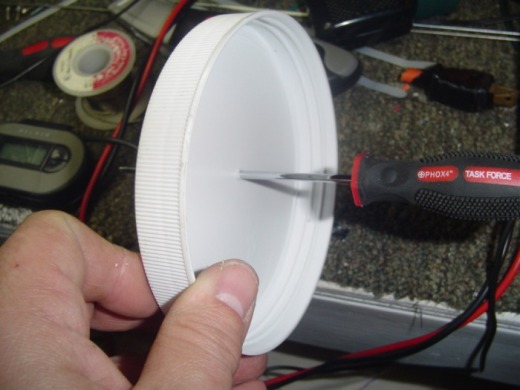
So I tried the "North Pole". Got tooo much noise from the lights on the outside of the pole. Decided to put it in a separate container. So at 11:30pm in the evening...I saw this container that had zip ties in it. Perfect. Grabbed a screw driver and shoved it through the cap. This would be where the antenna would go out the top.
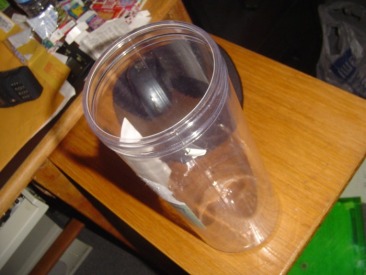
This is the plastic container. I put a hole in the bottom for the speaker cable and power cord to go through.
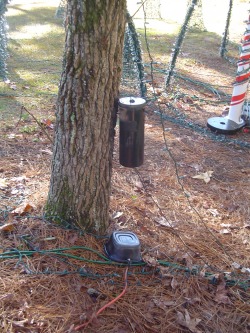
This is where the transmitter ended up. It is on the backside of a tree facing the street. I stapled the wire antenna to the tree. I painted it black so the light would not reflect on it (needs another coat ;-) . However, I left a little window to look through...to make sure the power is on if it goes out...again. Works GREAT now though. Increase the distance another 100ft on either side of the house. Now the neighbor across the street from her house...which is what she asked to do :-) Just need to take request from them next year!
The walwart is in a Glad disposable container on the ground. Both containers have the holes sealed up with caulk.
The walwart is in a Glad disposable container on the ground. Both containers have the holes sealed up with caulk.
Ok.....take 3!
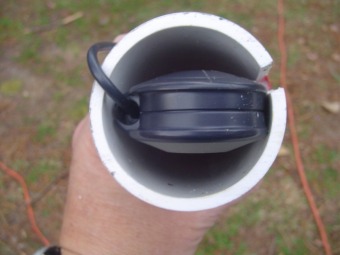
With the transmitter right up against some other lights...I could still hear a "hum" on one of the songs (that was softer). Was not good. Also still wanted to over come the signal fade with 2 RADIO STATIONS on either side of my frequency (just hope no other radio stations move in! Have a station whose transmitter is down in Thomaston (if your familiar with the area)...88.9 and then WARS in ATL on 88.5. Oh well. Found out something very interesting. Got it even closer to the street (above picture is only 20 or so feet away). I stretched the antenna straight up and down. No twist as the above is doing. GREAT SIGNAL! Got to remember that for next year. Below is the result of this page (http://basillionlights.com/Tech/LightsTechTransmitter.html) Great idea and works great. Will leave up to you to see those pages on the basic construction. I will post mine with a few changes. One change I will make for next year...go to a 3" pipe. 2" pipe as shown on this site it just too tight. As you in the picture. The AC power adapter cannot fit. You will see what I had to do in the next few pics. I will say though, it is a neat idea shown from basillionlights.com.
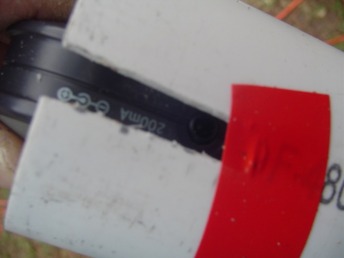
Kind of hard to see how tight it is here. I have to have the power plug fit right here. This is snug against the side.
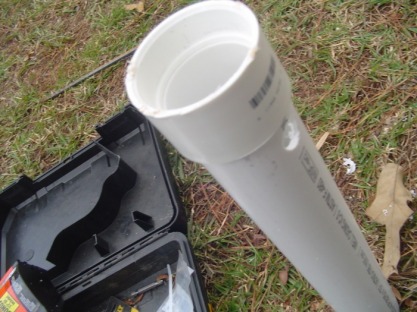
This is a shot of the post in the ground. I have a coupling on top and then a hole for the speaker cable to fit through.
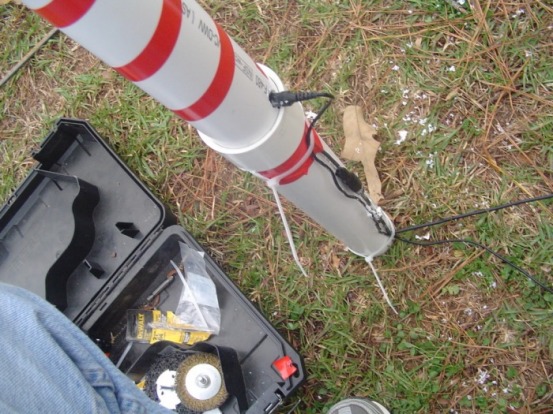
Hard to see, but the AC plug is coming out of the side. (Still have some chalk on it from the other container). Also taped up the hole from the speaker cable and added some strain reliefs.
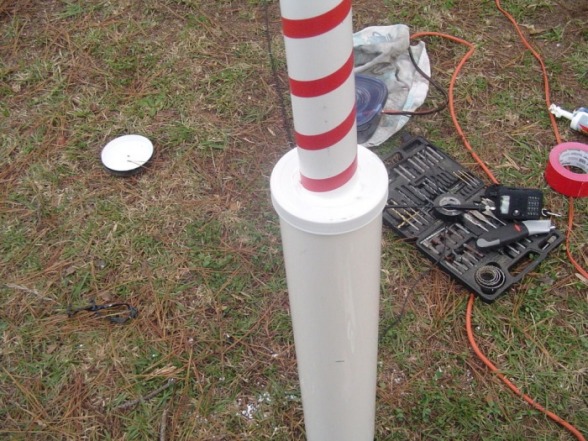
Hard to see, sorry for the washed out picture. This is using pipe that I had left over from my North Pole project. I slipped it over the pipe to add some water proofing. Had a cap to one of the tie wrap containers as well. Cut a hole in the center and slipped it over the 2" pipe. Adds a lip over the 4" pipe which will keep water out. Then chalked up against the smaller pipe. Now it's water tight :-)
Another shot of the finish transmitter enclosure.
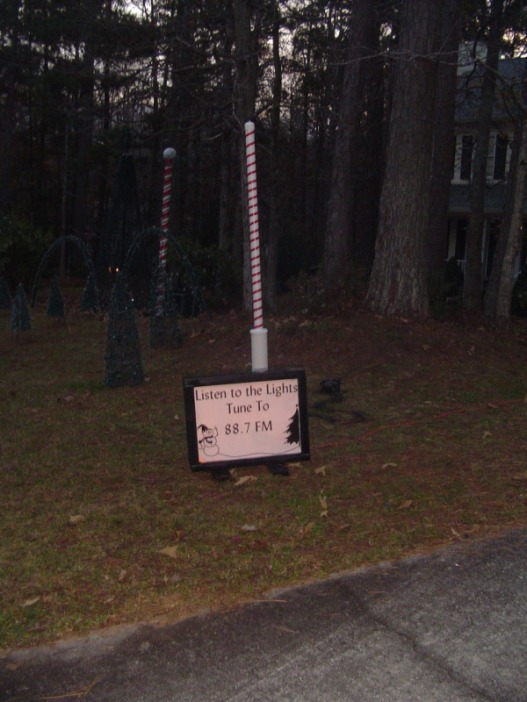
A shot with the transmitter "Candy Cane" next to the radio sign
Update as of 1/7/10
I wanted to take out the extra 4" pipe out of the equation...that was on the bottom. In order to do that...I had to wire the adapter directly to the transmitter. Because of the "wall wart" that I have...it could not be soldered directly to the battery terminals. That would require a 3v "wart"...and I have a 12v one (actually measured 14.4v!). It is what I had to use (or not need on anything else) and also wanted to put the extra power into the transmitter...for possible "More Output" from the Tunecast II. Have no idea if it does, but just in case. Using the 12v plug meant I had to wire it to the "plug" on the side, which would take a 12v input. The below pictures are TERRIBLE. Sorry for such out of focus pictures. I need to remember to wear my glasses the next when taking pictures ;-) I would retake the pictures, but I have already put everything together and have stored it away. Will take some and post them at the beginning of next season. The best pictures really for this project is on this site; http://www.bazillionlights.com/Tech/LightsTechTransmitter.html The only thing different I am doing here is going directly to the plug, which is a little more involved.
Wiring up thru the plug.
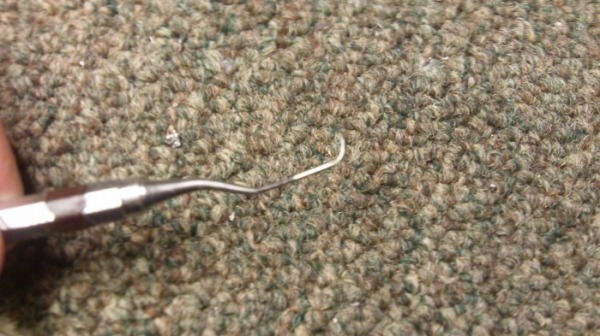
What is this? It is a dental tool. I used it to "pop the cover" on the plug...on the Tunecast II.
Wiring up thru the plug
This is the plug we are going to pop open. This picture and others are terrible...sorry.
Wiring up thru the plug
Take the dental tool and put it thru the hole where the plug went in. Push on the little "top" that covers the plug. It should pop off. You could use a very small screw driver to do this as well.
Wiring up thru the plug
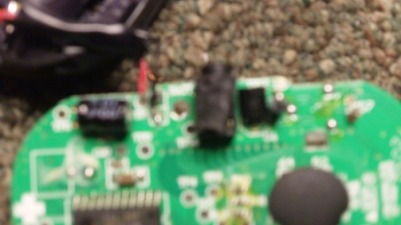
Hard to see in this picture, but there is a little tab that is pushing against the center pin. This acts as a switch to go from battery to the 12v power source. You must disable this little switch by bending it out. The tab is to the left of the pin.

In this picture you can see where the tab is pushing up against the barrel side of the plug. This is the one you want to disable.
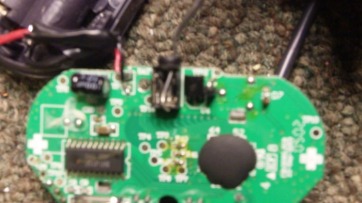
In this picture, the disabled tab is bent upward. Hard to see in this picture, but it cannot touch the center pin. The wire soldered to it is the negative side of the adapter. the wire soldered to the center pin is the positive side. These wires ran out the side of the unit where the antenna wire goes out. I had to trim back some of the plastic so it would clear without pinching it. Works great.
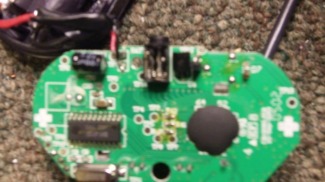
Again....sorry for all the BAD out of focus pictures. These pictures will give you some sort of idea on how to do this project.
Again....sorry for all the BAD out of focus pictures. These pictures will give you some sort of idea on how to do this project.
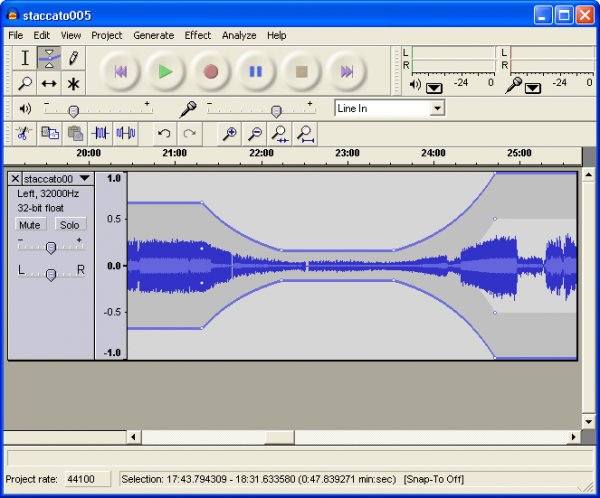
This is teh software I use to edit my music and other clips for the show. It's called 'Audacity'. WONDERFUL program and will even let you edit mp3's you use on your ipods! And it is FREE.
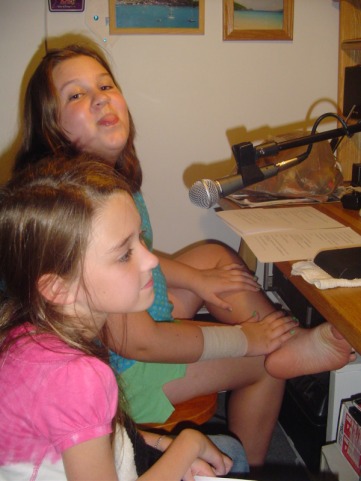
Here are my daughter's recording a bit for the show.
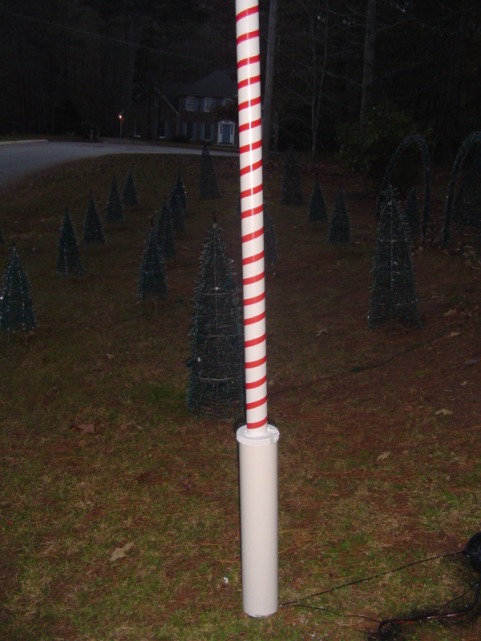
North Pole....Candy Cane?
When doing my static display for years (and as you see my static display in the Photo Gallery)...I had rope lights wrapped around my trees in the front yard pine island. For my animated show, I was going to use 3 layers for 3 channels. That was going to be many of the bass lines from the songs in the show. Oh well.... Found out how many AMPS those rope lights pull (non-LED). Decided to go with ONE large Candy Cane or North Pole wrapped with ONE rope light and several strands of mini lights.
The following shows my progress.
This was my "experimentation" with this. Put the rope light on...then decided it would be easier to wrap the thing first with the tape...more on that later.

This is a 4" , 10ft, Scd.40 pipe. Decided to cut down to 8ft. Was just too tall. Now it fits inside my study / workshop / ham shack ;-)
I decided to wrap it in tape instead of painting it. I think it will hold the season, maybe a few in Georgia. MUCH easier than painting it!
I decided to wrap it in tape instead of painting it. I think it will hold the season, maybe a few in Georgia. MUCH easier than painting it!
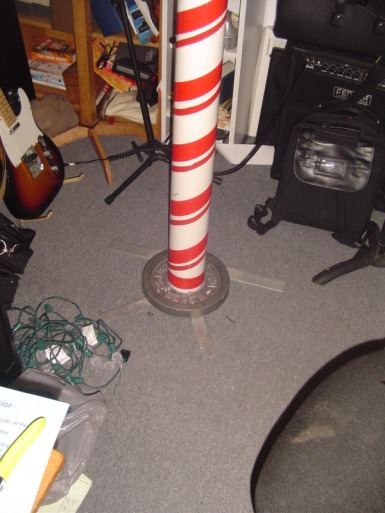
Hard to see....but that is a 25lb weight with some aluminum flat stock screwed into the weight. Huh? This was from another project. It held a table for my laptop and radios in my van. Moved to a truck...and had to downsize my ham radio setup. (with another 25lb weight on top of the base 25lb weight). What you can't see is a pipe bolted to a flange on top of the weight. Worked to hold it up in the shack. Later scrapped this setup for outside though.
Good staple gun, zip ties...on the backside of the pipe. Used this to secure the lights as I wrapped them to the pipe.

with the white rope lights wrapped and on.....
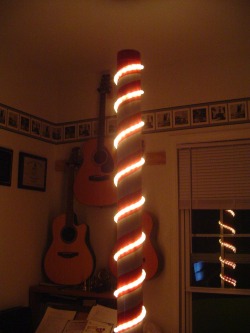
with the red lights wrapped and on....200 minis
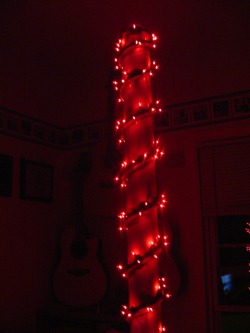
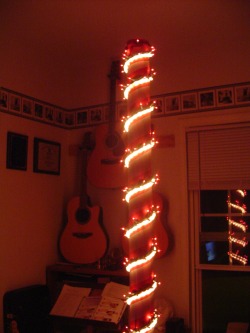
red lights......
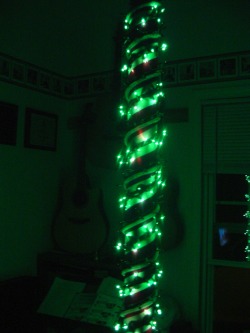
green lights.........
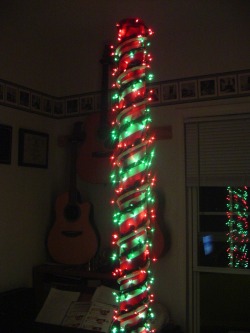
Sorry for the out of focus picture..... Bright! Kind of like ..."Disco Lighting" when I tried it with a few sequences in my room ;-)
This shows the toilet flange attached to the weight. Thought this was going to be a good idea. Well it was... It sure wouldn't fall down! (even in high winds) However with the lights wrapped around it, this was hard to pick it up without breaking the mini lights. Changed this to a 2x12, 2ft long board. I used the 2 25lb weights on either side. Just needs to be on level ground. Easier to pickup and move now.
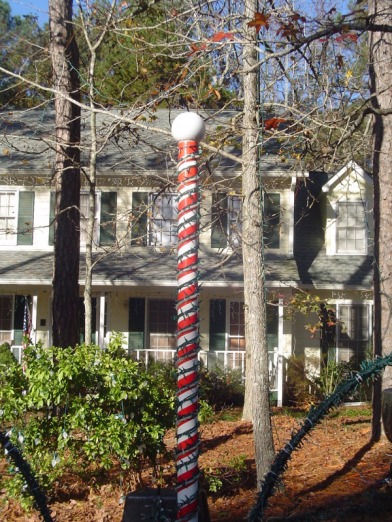
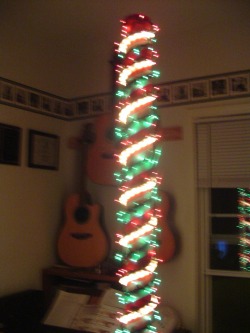
Here is a shot of it outside. I added an acrylic globe from Home Depot. It has 2 100 lines of Red and Green minis in it. They are connected to the Red and Green minis respectively (2 separate channels)
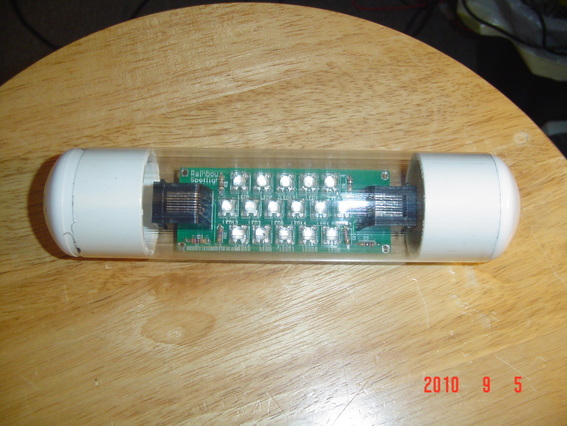
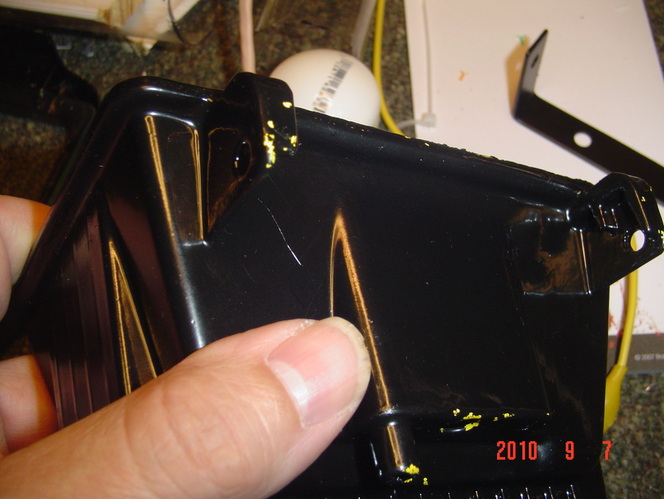
Rainbow Flood and Spot Lights
A new element for my display this year is RGB (Red / Green / Blue) Flood and Spot lights. To the right is the flood light. It is pretty bright if you have a light or completely white wall.
Rainbow Spot
This is a "Spot". The throw on it is not real far, but will spot pretty bright at even about 3 to 5 ft away. Be sure and have some "light in color" to wash.
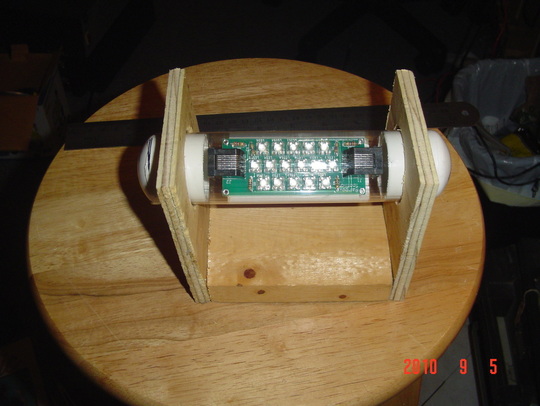
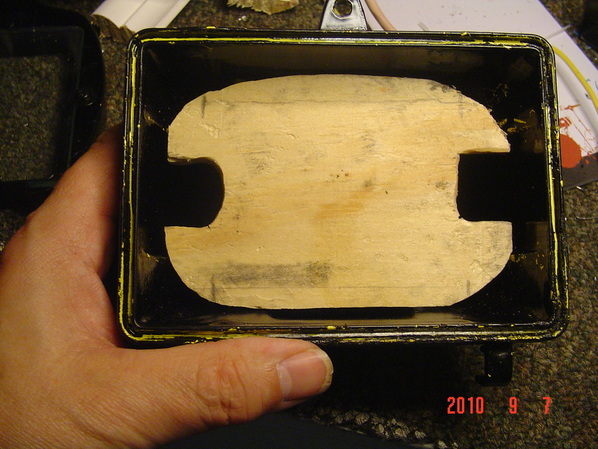
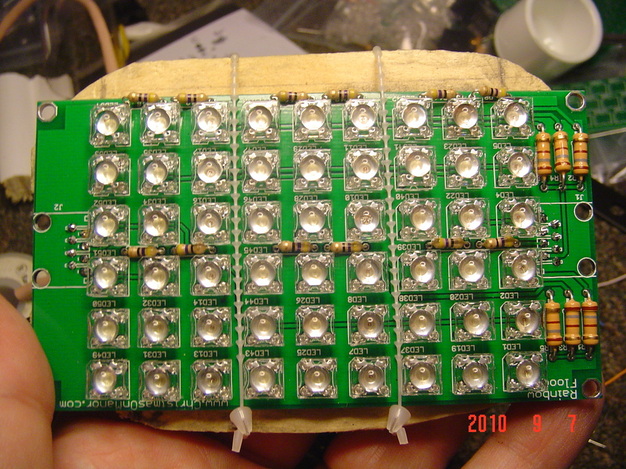
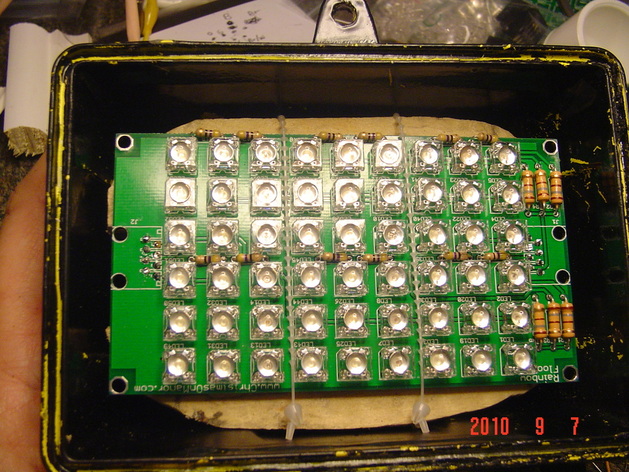
Rainbow Flood and Spot Build
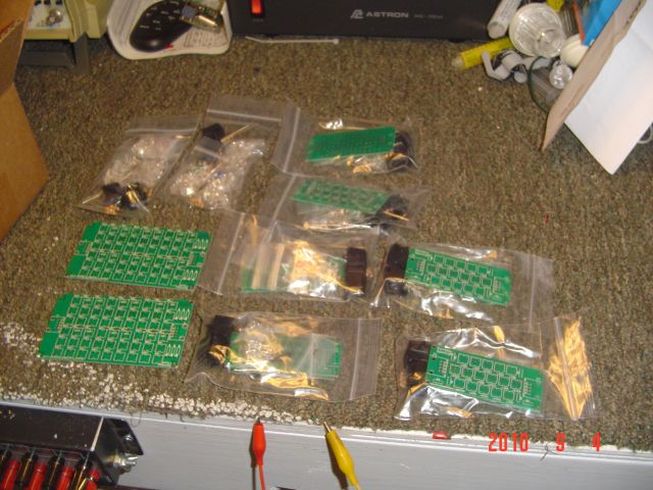
This is the boards on my crowded work bench. Very neat packaging and easy layout. Smaller bags are the spots, larger bags are the floods.
Rainbow Spot
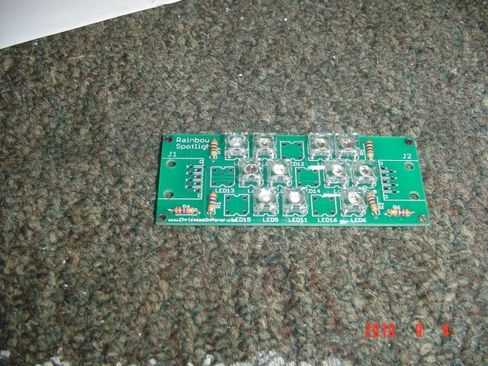
I won't upload every picture of the build, but as you can see it is a very simple layout.
Rainbow Spot
Small little thing, but pretty bright.
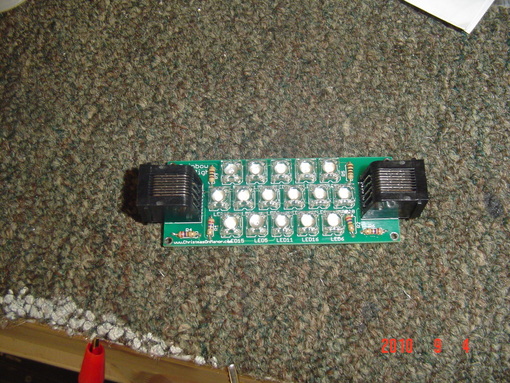
Rainbow Spot Housing
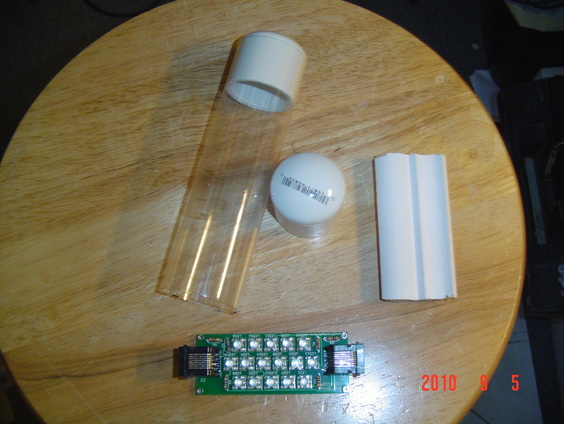
Very simple housing. However, I might change this for next year. The tube is a florescent plastic tube bulb protector. Comes in 6 to 8ft lengths at Home Depot. Caps are just pvc pipe caps (don't remember size) and a piece of wood molding. It helps keep the spot from moving around.
Rainbow Spot Housing
This is a side shot of the molding. Very simple. The curves helped keep the board straight in the tube.
Rainbow Spot Housing
Kind of hard to see here, but real easy to just cut with scissors. Just bend it flat before you do cut it.
Rainbow Spot Housing
I ended up pushing it flat then drawing a line with a straight edge.
Rainbow Spot Housing
Also used a razor to do some of the cutting...after the scissors dulled ;-)
Rainbow Spot Housing
This is what it looked like in the housing. You have to drill holes then make the Cat5 connectors on the ends. Seal up the ends with caulk after that.
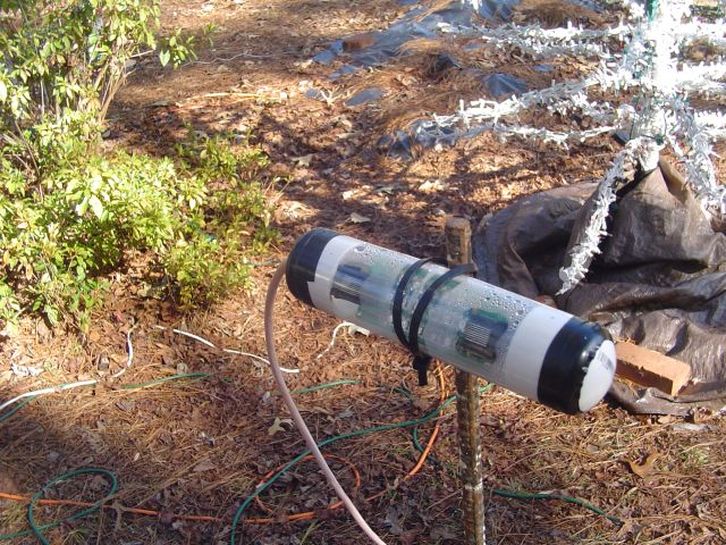
Rainbow Spot Standoff
This was an idea I had for a standoff. I was going to spot the trunks of the trees...but soon found out having a WHITE surface was better to spot. Ended up spotting the snowflakes in my display. Will show later some of the standoffs I used.
Rainbow Spots
This is a picture of how I have two of the Rainbow Spots mounted on a pole and on a stake...spot lighting two of the snowflakes. Little crooked, but works great.
Rainbow Spots
Now, this shows something that I hope doesn't hurt me through the season. This setup does not vent the moisture to well. You can't see it, but I actually have some holes in the bottom of the tube. It is still holding moisture in. This is not moisture from rain but from heating and cooling. I plan on putting more holes in the bottom to see if this will help. This is not happening on all of the spots. Not sure why. It still works though, quite nicely.
Rainbow Spots
I have this one zip tied onto the porch railing. Works fine this way.
Rainbow Flood Housing
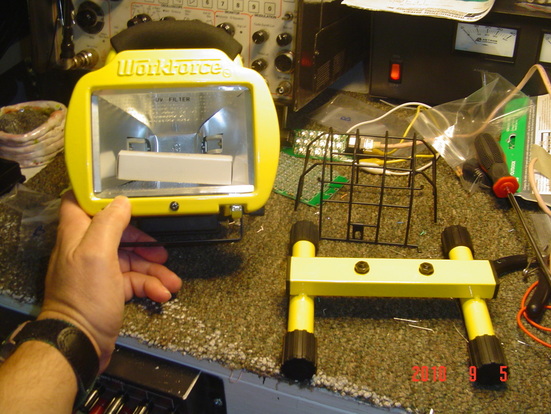
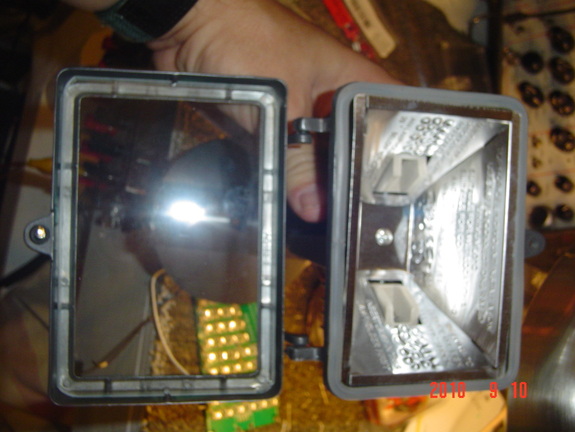
This is a worklight from Lowes. This was the flood housing for my first flood.
Rainbow Flood Housing
Of course...you have to strip everything out of it to make it work for the Rainbow Flood.
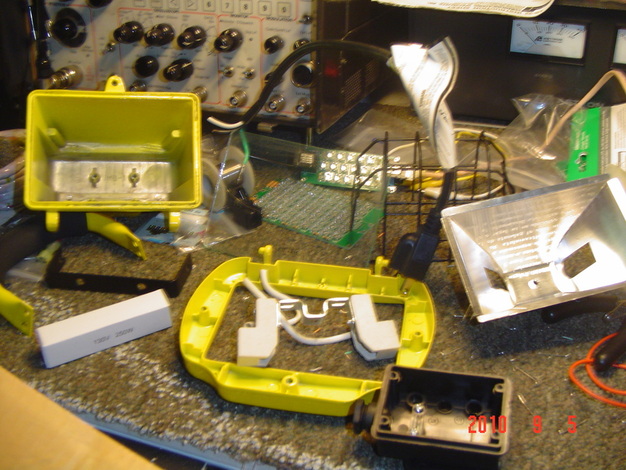
Rainbow Flood Housing
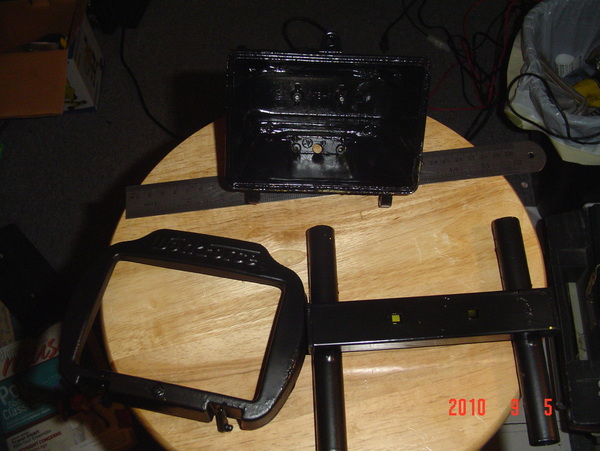
I thought painting everything black would be a good idea. How wrong I was.
Rainbow Flood Housing
That paint would not adhere to the flood to save it's life! Should have left it yellow.
Rainbow Flood Housing
I ended up using a board shaped for the inside of the flood light housing. The cutouts provided the space for the Cat5 cable to be wired up to the board.
Rainbow Flood Housing
I ended up using some zip ties I had to hold it onto the board. Very simple...it wasn't going to move. Also instead of using the Cat5 connectors, I wired directly to the board...from the backside.
Rainbow Flood Housing
Looks clean inside, but it was kind of a bear to get in correctly. Notice the paint scratches. Never try to paint these things!
Rainbow Flood Housing
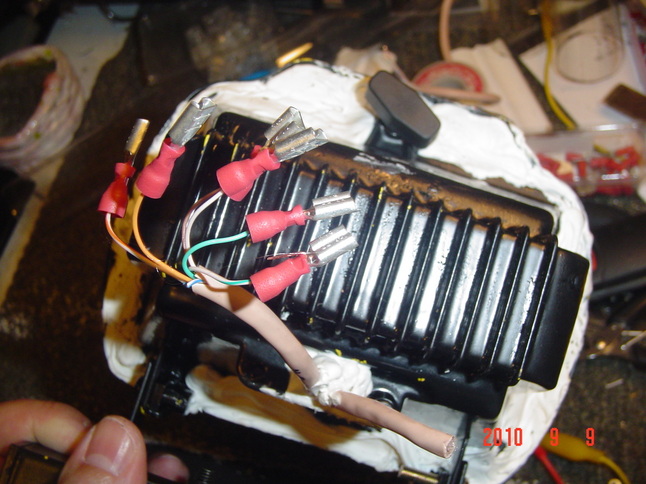
I really could have come up with different connectors, but it is what I had on hand. These are spade connectors. The other cable coming out is for when and if I daisy chain these. Notice the chalk. It had a terrible gasket on it. It was not going to be water proof. So TONS of chalk was used to seal it. I found a better solution later. Little bit more in cost, but fits much better and is more water proof. I would not recommend using this type of flood for the Rainbow Flood.
Rainbow Flood Housing
This is from Home Depot, I believe. Cost was about $10.xx per unit. Hinged and great casket on it. Used this one for my other flood. Added a few components with it too.
Rainbow Flood Housing
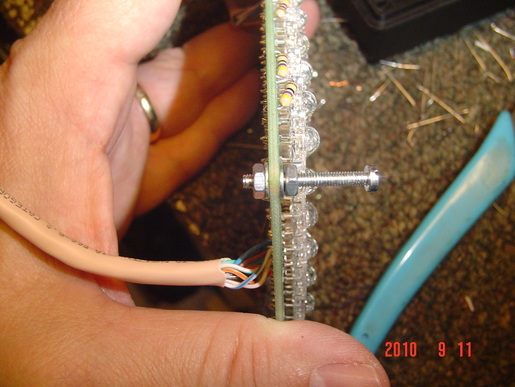
I believe these were 8x32's..but don't hold me to it. The board fits into the unit without any trimming. The screws hold it against the housing. Note the Cat5 wired on the backside.
Rainbow Flood Housing
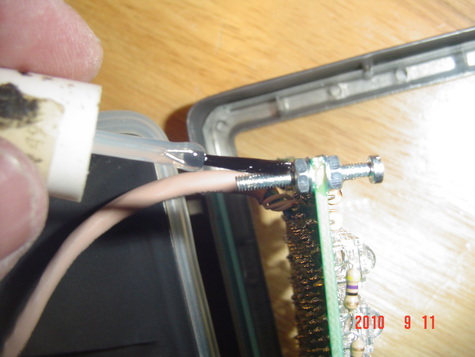
I used some clear finger nail polish to act as "Lock Tight". You have to play with the length to have it screwed out and to fit the thing into the housing.
Rainbow Flood Housing
Very neat and very clean instal. I will always using this type of housing from now on when I add more of these.
Rainbow Flood Housing
Notice the Cat5 goes through the adjustment piping. Angle is easily adjusted and does not distrub the cable.
Rainbow Flood Housing
Notice the metal coupling and the pvc pipe on the end of it. PVC pipe was already threaded for the need :-)
Demo of the Rainbow Floods and Spots
Below is a good demo of the Rainbow Floods and Spots. The trick to using these are to wash a light colored wall or object. I will add 3 more spots at least for the 3 snowflakes that are not spotted. My intent was to spot the trunk of the trees in the center of the pine island. It really didn't show well. After spotting the snowflakes, it really made them pop out. They are about 3 to 4ft away from the snowflake. You can look at the floods on the upstairs and the carport walls. The carport wall is effected by the lights in the bushes and the ice lights. These are dirt cheap and easy to build. Debating on using MR16's from Home Depot, but will probably go with these again. Just will need to get another DC LOR board. Really easy to use with the current power supply I already have.
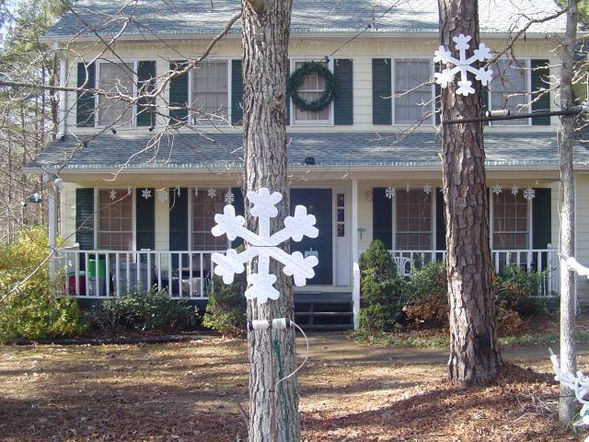
Snowflakes
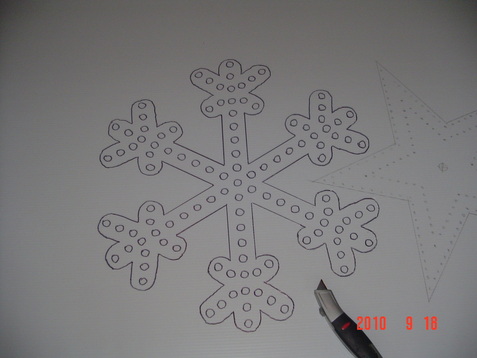
This is a picture of the prototype I used for my snowflakes. I got this design from Chris1976 on the Planet Christmas forum. These are made out of coro board. Coro board is what political signs or For Sale signs are made out of. I used a projector to project the image and then used a marker to go over that. You also see the tree stars next to it. I ended up using a jig saw instead of a razor. Much easier.
Something to note here if you are building these. Be sure and cut out all the snowflakes first. Then be sure and use a small bit to begin with. You might consider stacking some or all your snowflakes together when you drill the first small holes. Use those as your guides. Then work your way up to the size of the mini light itself. Sorry, didn't write down what the size of the bits were. Make sure they are snug, not loose. Mine stayed tight all season long.
Something to note here if you are building these. Be sure and cut out all the snowflakes first. Then be sure and use a small bit to begin with. You might consider stacking some or all your snowflakes together when you drill the first small holes. Use those as your guides. Then work your way up to the size of the mini light itself. Sorry, didn't write down what the size of the bits were. Make sure they are snug, not loose. Mine stayed tight all season long.
Below is a pdf of the above snowflake and below star
| star-snowflake_pdf-1.pdf |
Snowflakes

This was a 4x8ft sheet of coro board. You can see how all the snowflakes got laid out.
Snowflakes
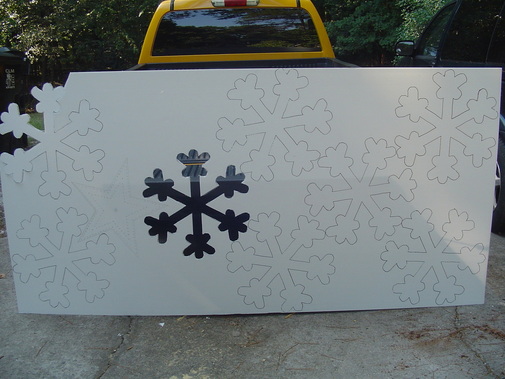
Little better shot of snowflakes laid out on the 4x8ft sheet. You also see one of the stairs for the trees in the mix too.
Snowflakes

I used a jig saw to cut everything out.
Snowflakes
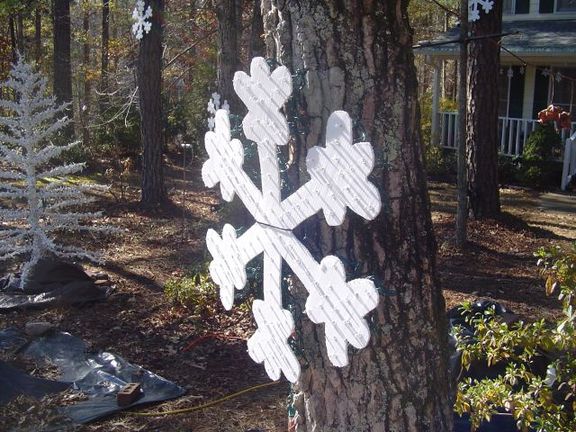
This is a snowflake zip tied to one of the trees in the display. The zip tie disappears in the dark and when the mini lights come on.
Snowflakes
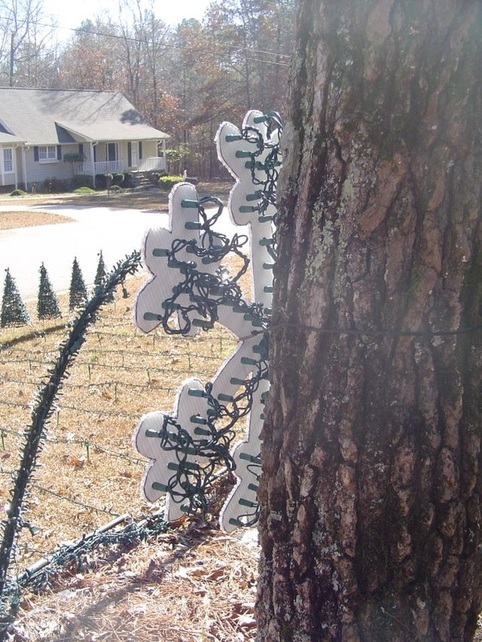
You can see the mini lights "shoved" through the coro board. Important to "skip" every other hole. Then go back to fill in the slots. This design took 100 mini lights and then a set of 20 lights. Your choice. You can custom cut or you can just use black tape to tape up the lights NOT being used. Tuck them away on the backside. The minis are tight into each hole. No glue is needed and has worked flawlessly.
Tree Stars
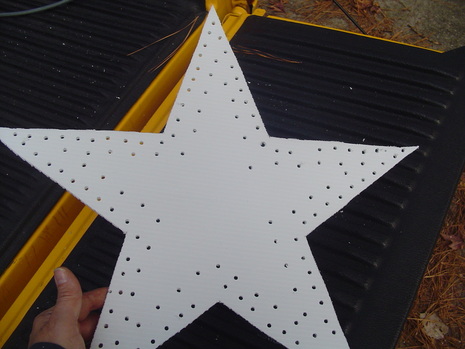
Closeup of the tree stars made out of coro board. I used 100 incandescent minis for the outside and 50 LED's (cool white) for the inside. Not perfect, but think they look nice on the tree.
Tree Stars

Kind of blurry, but gives you an idea of the color differences. Looks good at night.
Single Sided Mega Tree
I will post more pictures later on this. You can visibly see that the trees have just a "front" side. Why do you want to do this? When your display really a "from the front" type of display. That is how mine is. You can see that this is taken almost from the backside. With careful sequencing, you can still get the "spinning" and "wipe" effects that makes it seem circular. I was able to cut down on strings of lights and my total amp count. (actually had lights left over! ;-) Might be hard to see from the picture, but these might be considered "mini mega trees". They are about 9ft to the base of the star.
Single Sided Mega Tree
You can see mess of plugs. Also...the LEAVES. How I hate leaves! The more you pick out, the more they fall. Anyway...easy to work on this way.
Single Sided Mega Tree
Here is a backside view of the tree. It is about 10ft tall. Kind of a mini mega tree. You can see the backside of the star as well. With everything pulling towards the front, I have to use a guy to pull it back.
Single Side Mega tree
Really hard to see in this picture, but I use the c9 light stakes to hold down each line. I also zip tie this as well. THEY WILL SLIP DURING THE SEASON. You will want to adjust them for the sag later.
Singing Pumpkin
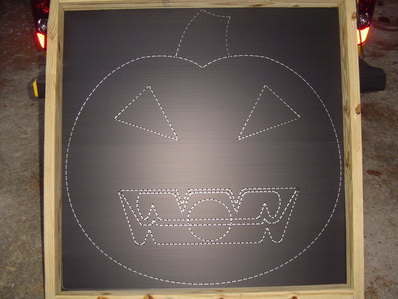
This is from my 2011 Halloween show. I got this from Holiday Coro (http://holidaycoro.com/). You can see the different mouth formations to "Sing" to the songs sequenced. This is from the backside of the pumpkin. I used 2x4's for the frame.
Singing Pumpkin
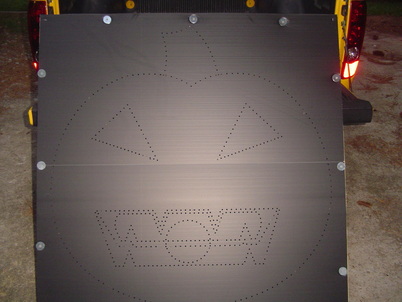
This is the front side of the singing pumpkin. Notice that there are no lines on this side. The orange mini lights will be punched through the holes.
