It has been awhile since I have posted about the RGB strips. I think I found a really neat solution for not only mounting these "Dumb Strips" (ones where the entire strip can be controlled, not the individual pixels) but for running them as well. Below is a sample of what it will look like on my gutters for Halloween and Christmas. Please note, the programming is not perfect for the gutter on the carport or one closest the camera;
They are REALLY bright! If you look at the individual LED's (5050) in the post below, you can see the spacing. In the video, it doesn't show. From the street, you can see the individual LED's. Anyway these were cut down from 16ft sections into 10 individual channels. Here is how they are broken down;
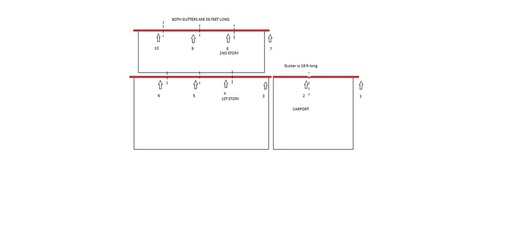
Wow. Didn't realize how small this was going to be. Anyway it is broken down into 4 sections on the top gutter and porch gutter. 2 sections on the carport gutter. *I May* add 2 more on the gables not shown in the picture, but can be seen just a little bit in the video. The only issue there is, I do not have a ladder tall enough to get up to the gables! ;-)
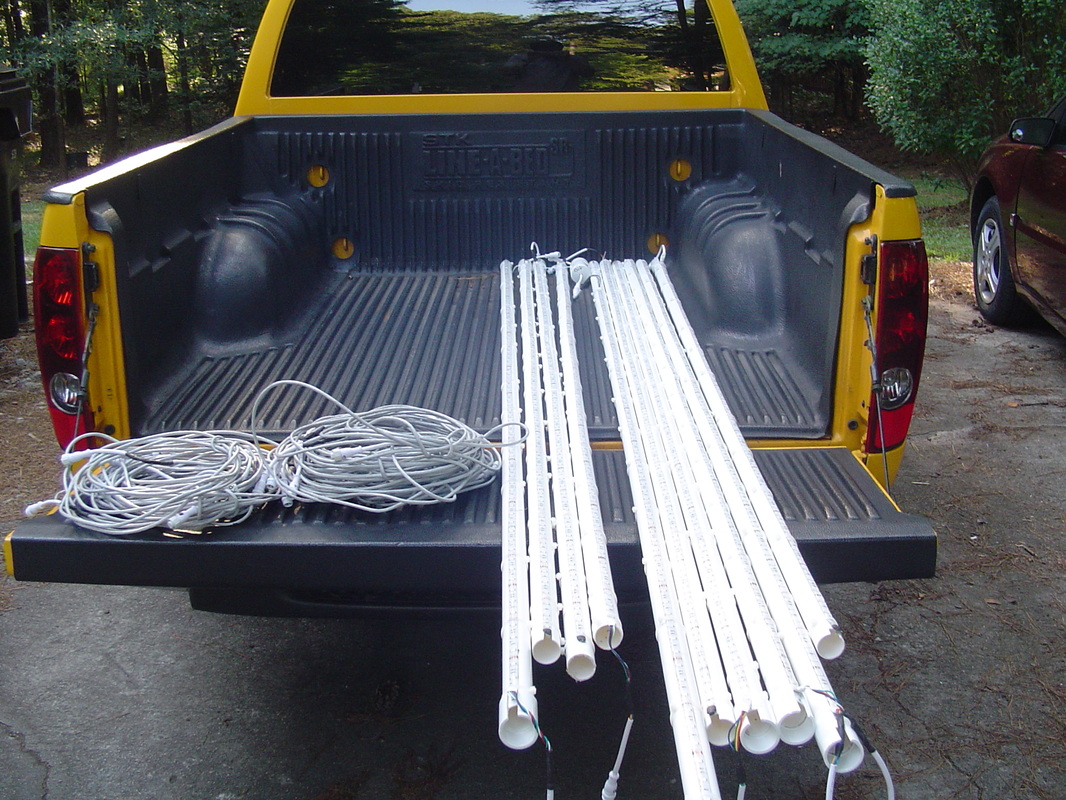
Mounting these RGB strips just made plain sense to mount them on PVC.
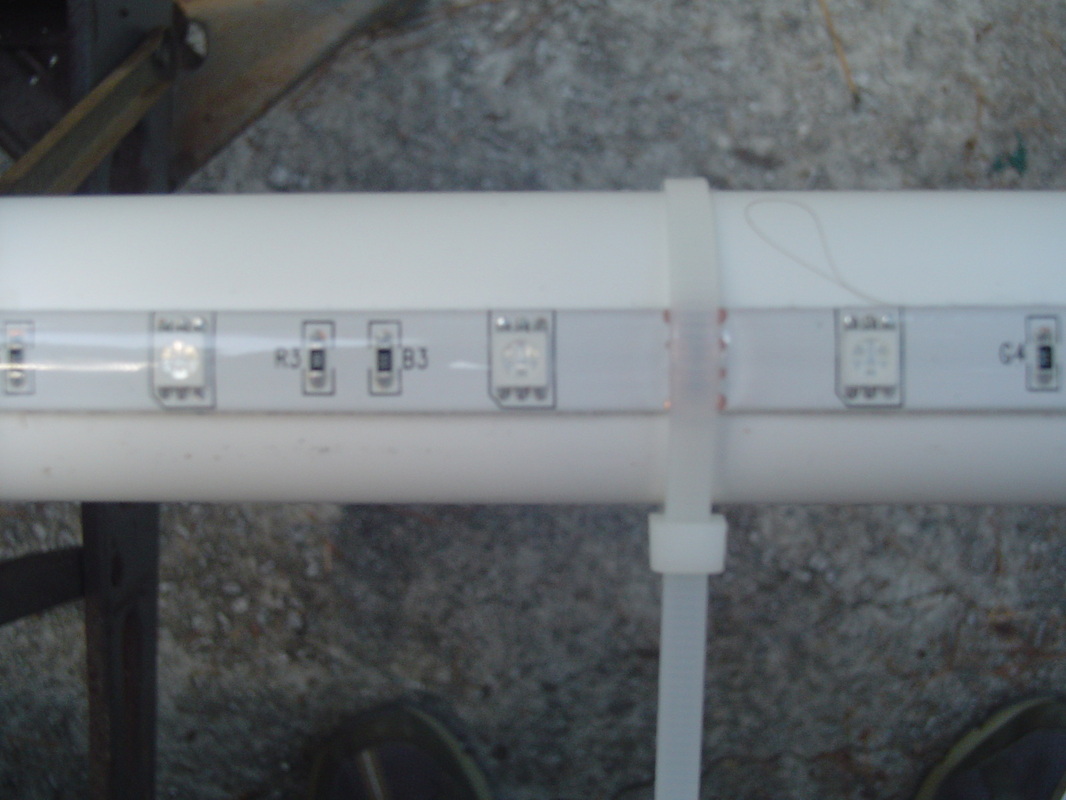

These strips actually came with an adhesive backing. That made for QUICK and easy install on the pipes. After that I went back and zipped tied in between the little LED's on the "seams". That way it wouldn't cut into any cap.s or LED's. I used the black text that is on every piece of pvc (kind of pipe it is, make, scan bar, etc.) to line it up straight. Again, easy install.
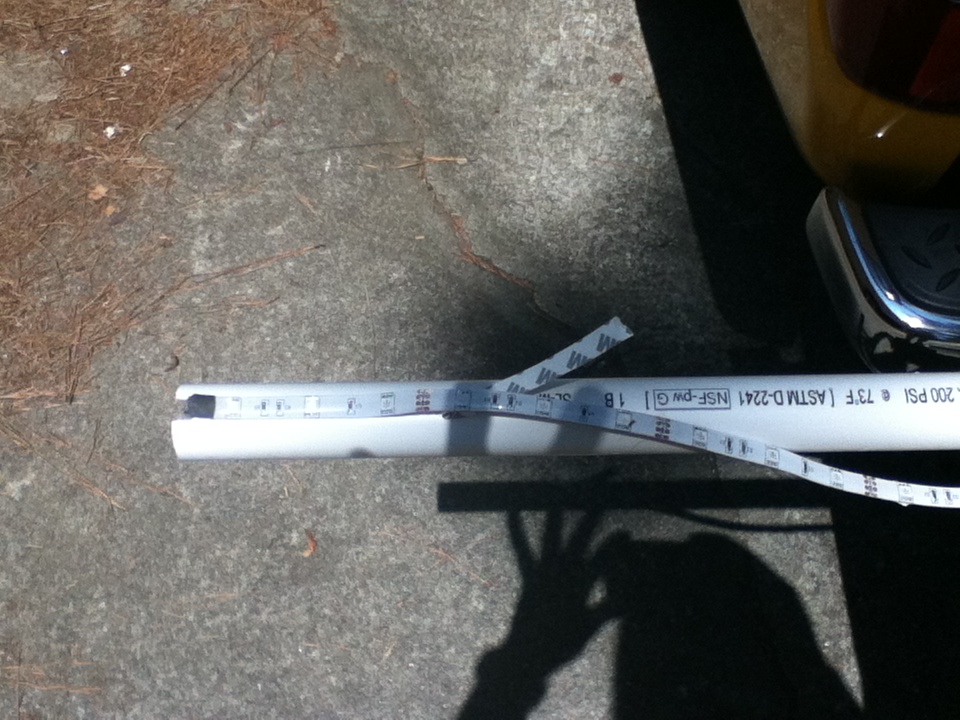
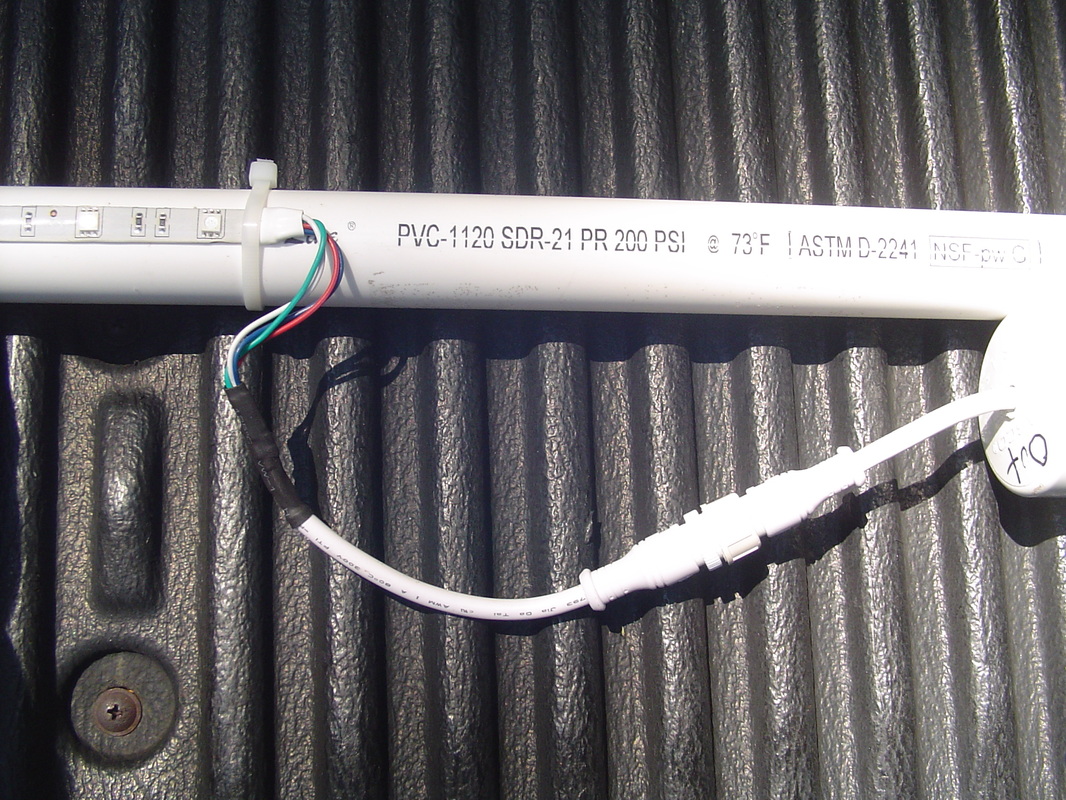
Kind of hard to see but I used "Heat Shrink" on the exposed ends of every strip. As you will later see, I also used it for the smaller wires within the strips and connectors as well.
Each pipe is cut down to about 6 to 8ft sections. This is what makes up the 10 different strips I am using. At the end of each section I use a 1" coupling. This coupling has a slit in it to accompany the strip;
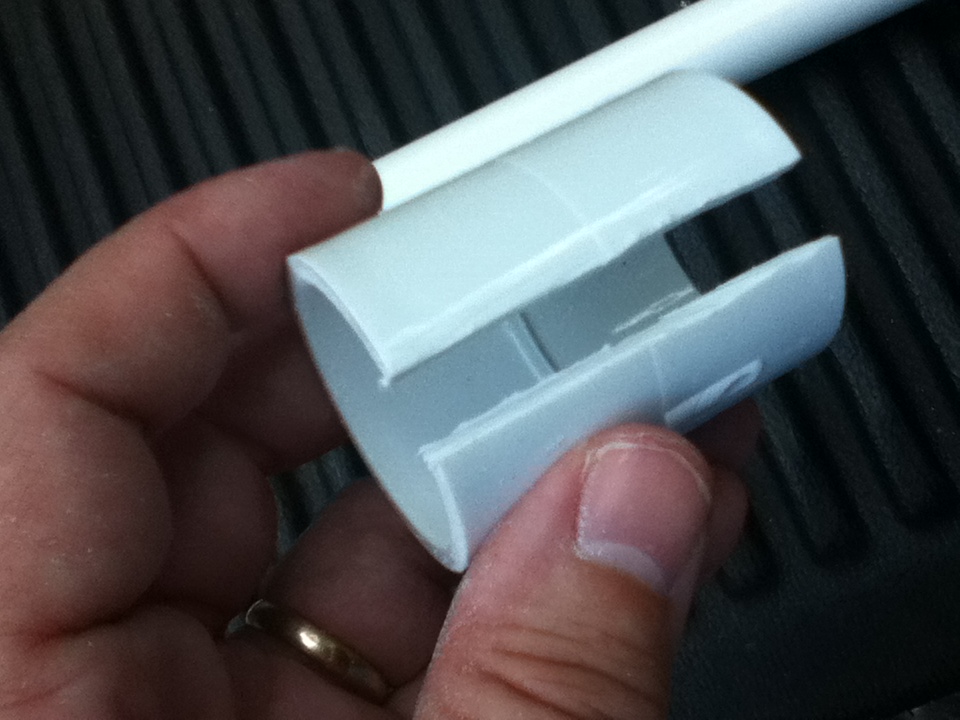
On some of the pipe ends I also cut a groove out so the RGB strip could go inside the pipe;
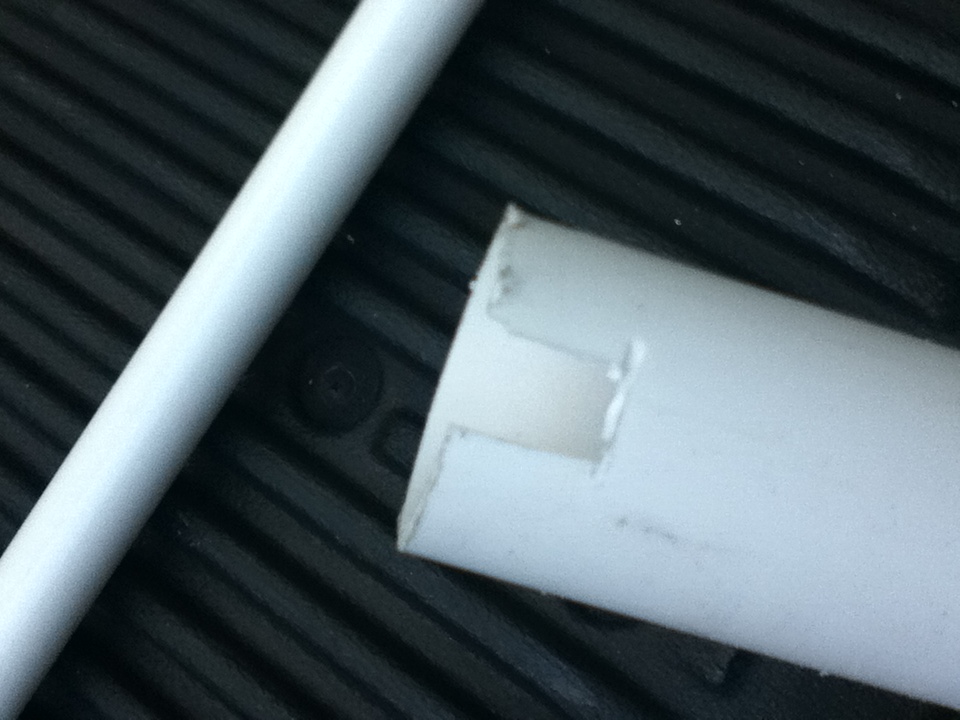
In using the couplings you will see that the pipes fit flush. I wanted a way for the RGB strips to go inside the pipes. This way all the wiring would go inside the pipes that goes to the controllers. In this picture, you will see that the "taped" end (I used heat shrink on everyone...but that one :-( ) goes into the pipe;
So the wiring for the upper and lower gutters went like this;
[Strip One >>>>>][Strip Two>>>>>>>>>>][Strip Three>>>>>>>>>][Strip 4>>>>>>]
Pipe..............Strip 1 wire inside pipe....Strip 1&2 inside.....1,2,3 inside...
Then at the very end you would 4 sets of wires for that gutter going to the controller. All wires hidden onto the end and then down to the porch.
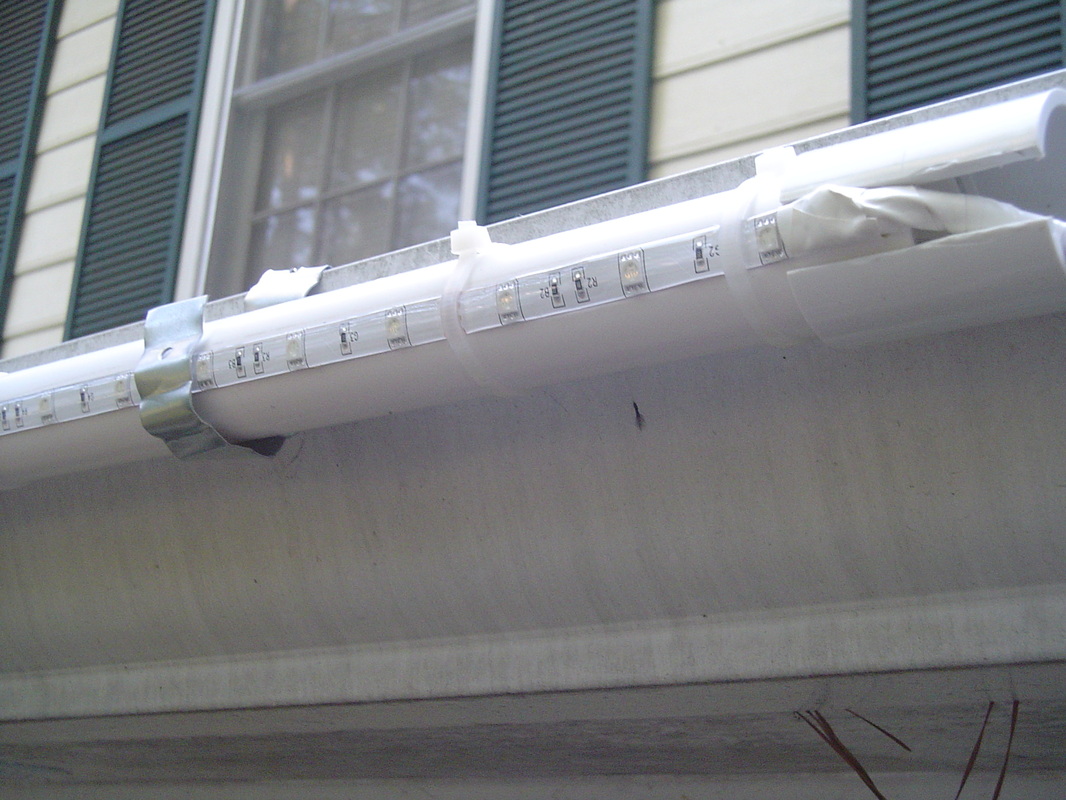
Notice the "Wall Tie" ("Wall Ties" are explained below) and how it is looped around. It is in between the 2 LED's so as not to block the light. Then it goes up over the gutter. I took my hand (with a gloove on for protection...remember it is sharp!) and gripped the side with the pipe and then gripped the backside so as to grip the gutter. This made for a tight fit that held up REAL well for several weeks. I honestly think it could have stayed up forever.
Not notice the slotted coupling. Notice that it is just small enough for the strip to go between. I tried spacing these so the LED spacing was just like it was on the strip. Hopefully that would help with gaps.
[Strip One >>>>>][Strip Two>>>>>>>>>>][Strip Three>>>>>>>>>][Strip 4>>>>>>]
Pipe..............Strip 1 wire inside pipe....Strip 1&2 inside.....1,2,3 inside...
Then at the very end you would 4 sets of wires for that gutter going to the controller. All wires hidden onto the end and then down to the porch.
Notice the "Wall Tie" ("Wall Ties" are explained below) and how it is looped around. It is in between the 2 LED's so as not to block the light. Then it goes up over the gutter. I took my hand (with a gloove on for protection...remember it is sharp!) and gripped the side with the pipe and then gripped the backside so as to grip the gutter. This made for a tight fit that held up REAL well for several weeks. I honestly think it could have stayed up forever.
Not notice the slotted coupling. Notice that it is just small enough for the strip to go between. I tried spacing these so the LED spacing was just like it was on the strip. Hopefully that would help with gaps.
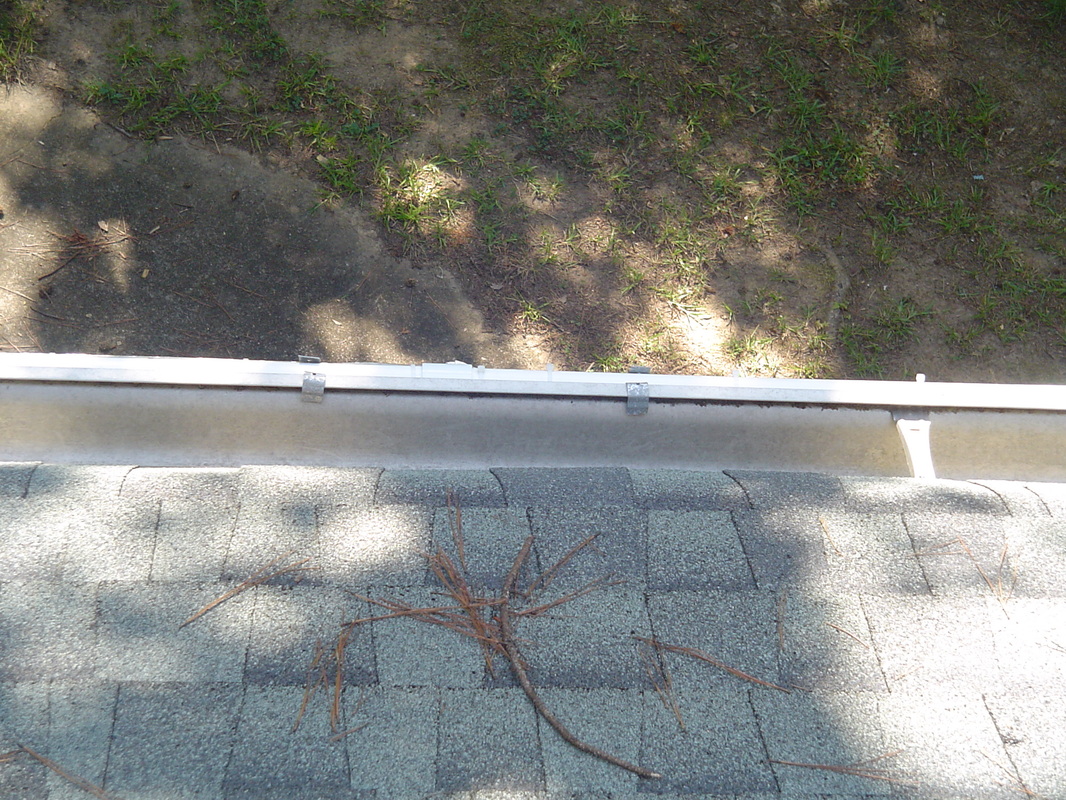
Next couple of pictures shows how straight this whole process keeps the pvc pipe and strips. Notice the backside of the gutter and the little lip. I was able to use that lip to keep a tight grip and not let it move during windy times. Pictures aren't the best, but gives you an idea;

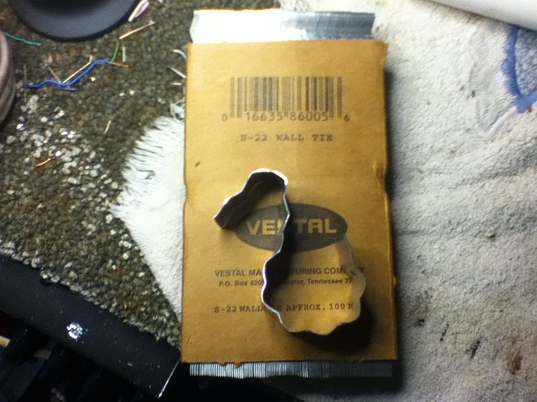
To mount these I used "Wall Ties" from Lowe's. Be careful with these...THEY ARE SHARP!!! I bent these into a "J" or really almost a "S". They come in a box of 100. I used 3 per 6 to 8ft section. Worked great!
Easy Storage! I actually have these hanging in my garage. Notice all the wire. That is Cat5. There was a thread I was involved in on Planet Christmas forum about the length of wire and whether this would work. This worked GREAT! No issues. Lots of wire and no real loss of power that I could tell.
Notice the little connectors on the Cat5 cable and the pvc pipes. I love these things!
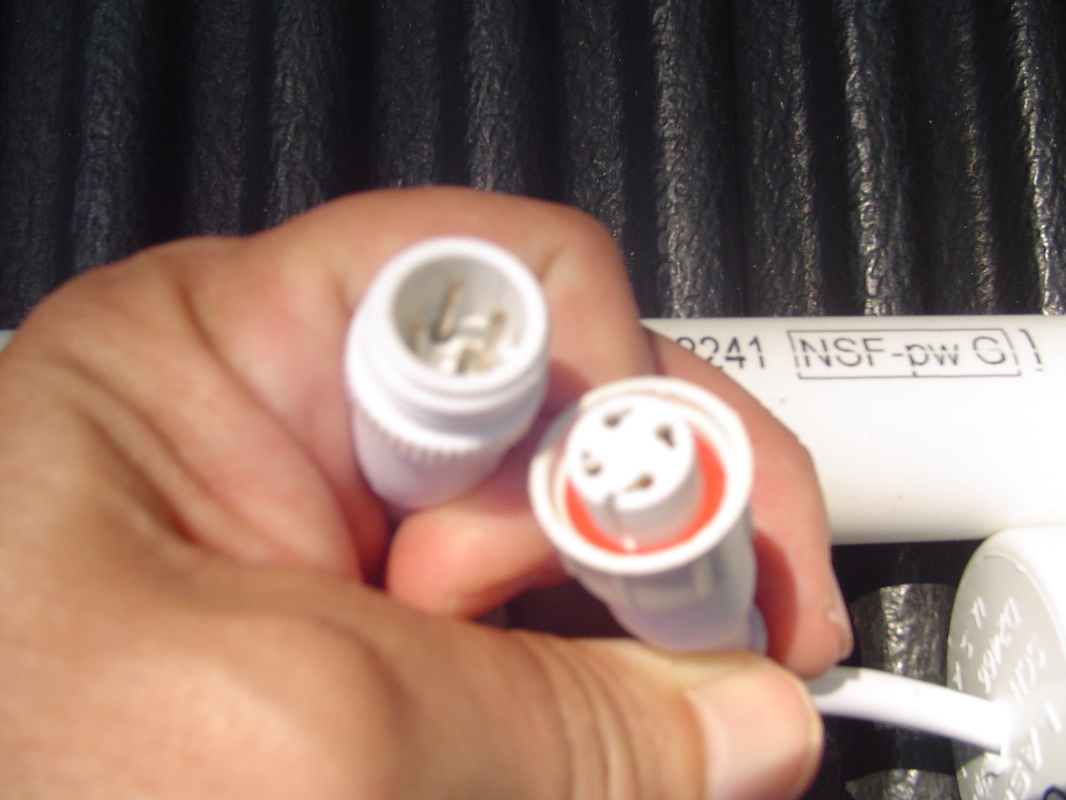
These water-proof connectors can be found from several different vendors. I actually found out as well, there are different versions of these. Hard to tell, but the one on the right has a SLOT for the KEY to mate up with the one on the left. This varies from model to model. Just be aware if your mixing and matching. I found the cheapest buy here. That place does group buys, so they may run out. Another source can be found here. Be careful what you are buying though. "Pixels" can be ran with 3-wire setups while the "Dumb Strip" that you see here need the 4 wire connectors.
The DMX Controllers I decided to use was the 27 Channel DMX DC Controller. I found this article on "Light Up Lawerence" which had a great explanation about this controller;
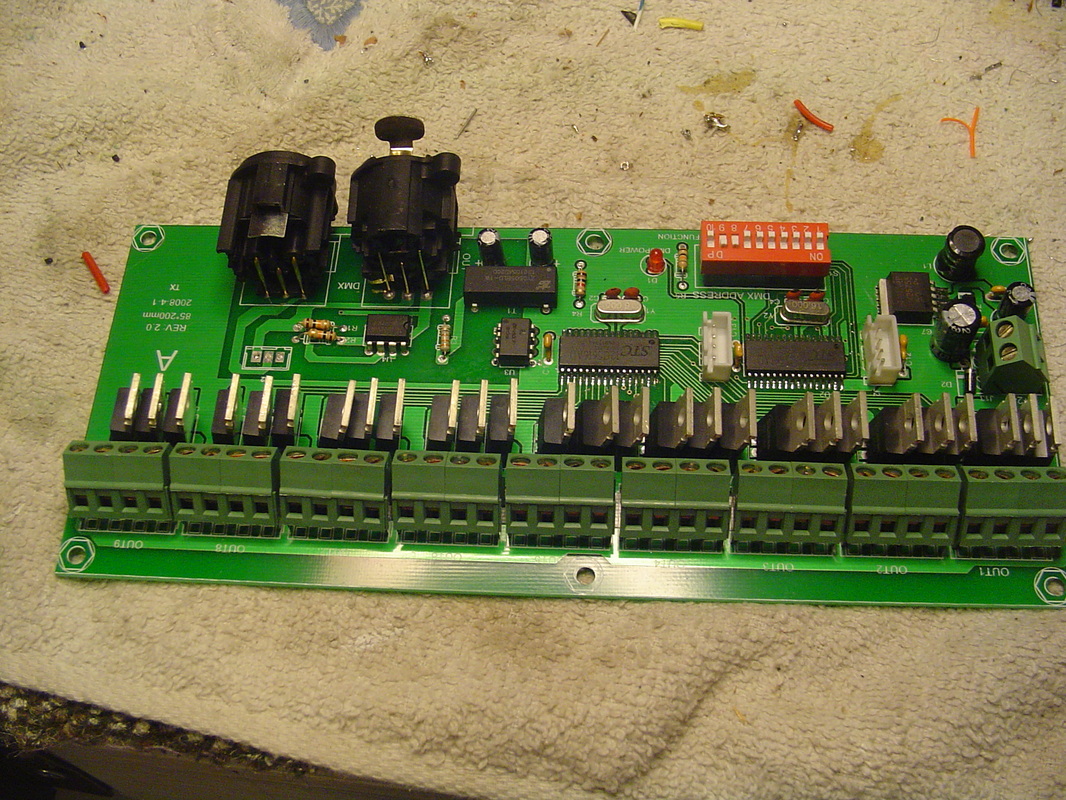
MUCH, MUCH better pictures can be found on the "Light Up Lawerence" site. I would click on that link and look at that if you are interested in this kind of controller. Ironic thing (as you will see there), this is much cheaper than the LOR DC controller. The only thing is (to my understanding) is that this will not "Shimmer" or "Twinkle". I believe that this is a fault of dmx. However you could probably simulate that function (which I probably will need to in converting some of my sequences.).
In putting this in some sort of box....I decided to go with just a Tupperware box;
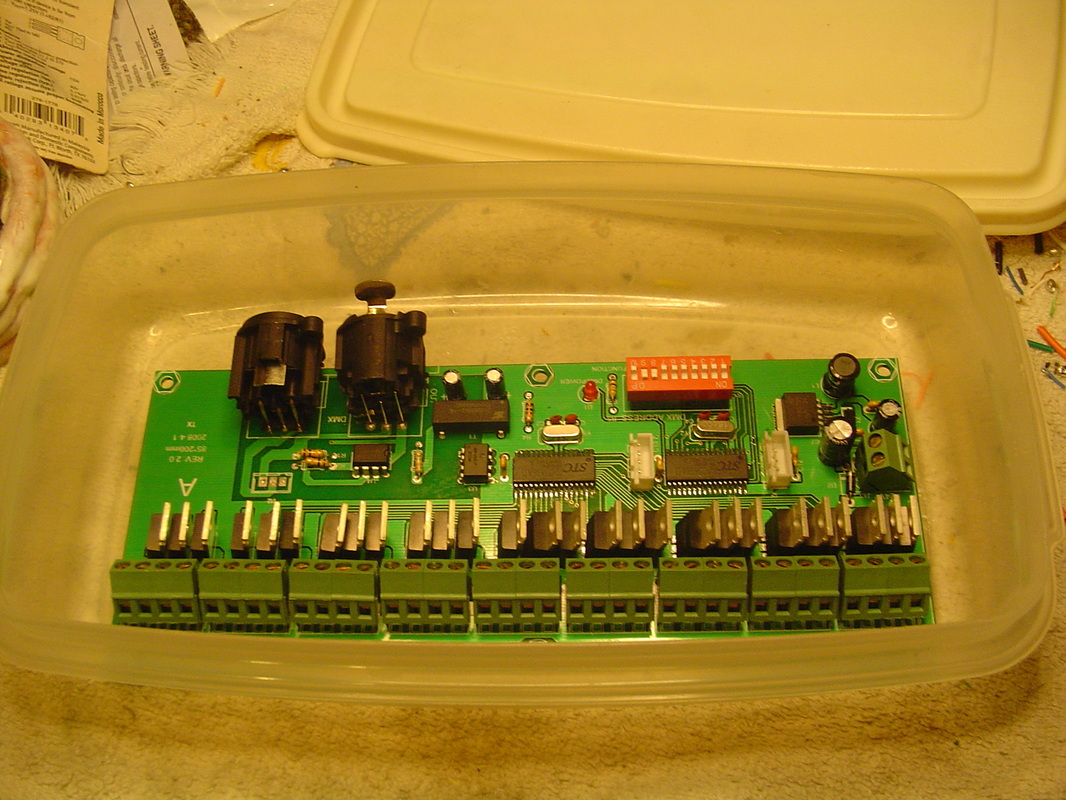
After that, put some holes in it (with a drill) for the dongles and the wiring. Just used Cat5 jumpers for the wires out;
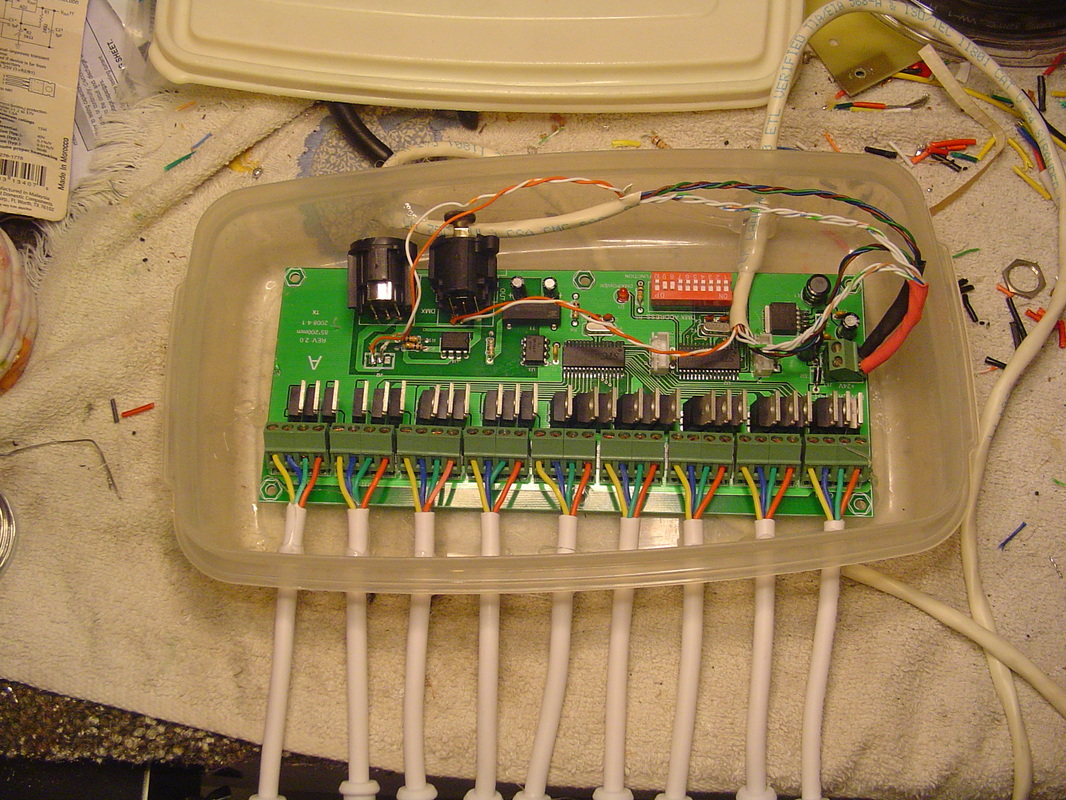
I also used the wiring scheme from "Light Up Lawerence"
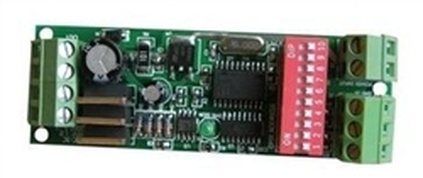
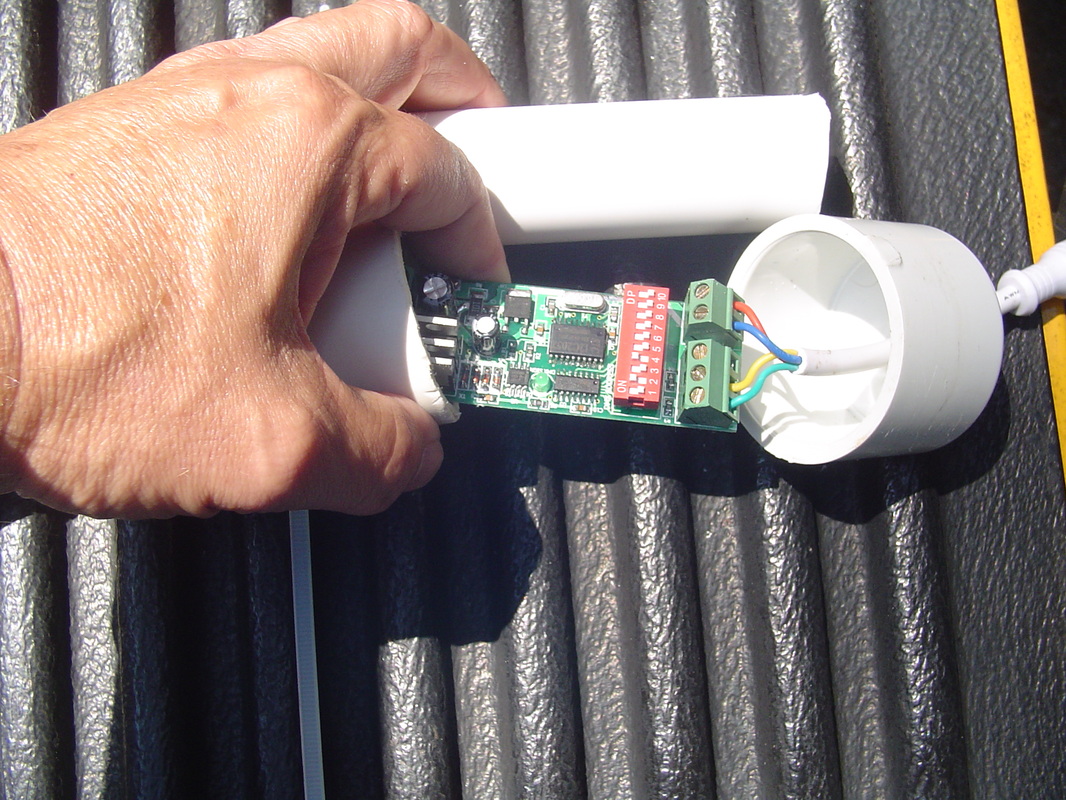
The 3 Channel DMX Controller seemed to fit the bill to add the extra strip that I needed. This can be bought at Holiday Coro.
I ended up using the dmx out from the 27 channel controller and going to my 3 channel dmx controller;

This was just tacked onto the end of the last RGB strip pipe. As David mentions in the video about the 3 channel dmx controller I just used the 1" pvc pipe with caps. After adjusting the dmx address needed, I will chalk the holes on the ends for water proofing;
 RSS Feed
